📓 1.1.4.5 Downloading and Installing Bootstrap
In this lesson, we'll walk through how to download and install Bootstrap into one of our own projects.
There are multiple ways to download Bootstrap. We'll address the two simplest approaches here:
Downloading the Bootstrap source code and then adding the files directly to your project
Using a CDN (content delivery network) to link to Bootstrap online
In future courses, we'll explore additional ways to integrate Bootstrap and other frameworks into a project.
Downloading Bootstrap
The first way we can add Bootstrap to a project is to download all of the necessary files and add them to our project. Then we'll link to them in our HTML just like we link to our CSS file.
Downloading Files from Bootstrap's Website
We are currently using Bootstrap version 4.5, which can be downloaded here. Note that later versions of Bootstrap will have differences from the version we use. However, most core functionality will still be the same. We do not recommend using other versions of Bootstrap with our curriculum.
Click the Download button of the first option, which is Compiled CSS and JS.
This will download a .zip file. Click on the file to decompress it. Here's what's inside:
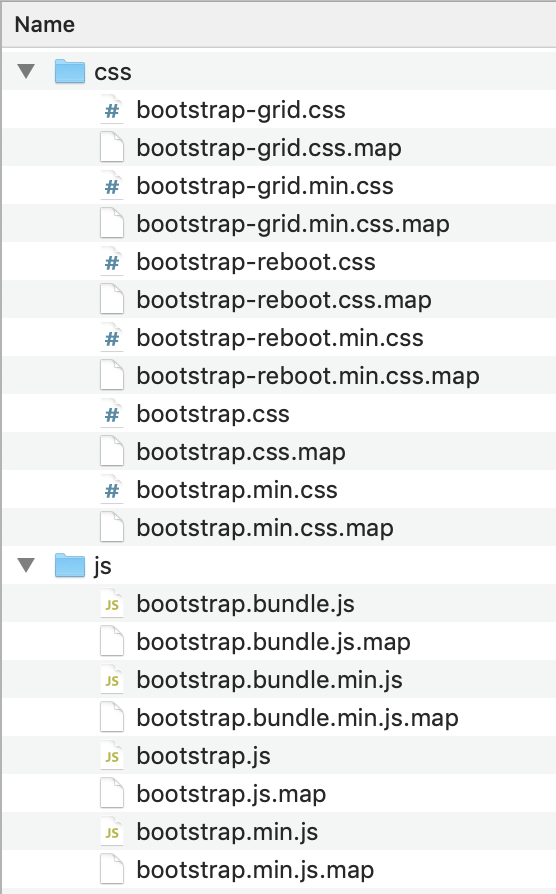
There are two directories: css and js.
- The
cssfolder contains files related to Bootstrap CSS. We can use eitherbootstrap.cssorbootstrap.min.cssin our projects. Here's the difference between the two files:bootstrap.cssis the larger version of the source code. If we open this file, we'll be able to read all the CSS rules, which can be very helpful when we are just learning about Bootstrap — and when we want to figure out how to override a Bootstrap rule.bootstrap.min.cssis a minified file, which means that the source code has been compressed so that it's more efficient for machines to read. However, it's not in a human-readable form anymore. This is great for production (code that's deployed online) because it's faster, but it's not so great for development (code that's in the process of being built — which is exactly what we are doing). We recommend usingbootstrap.cssfor learning purposes.
We won't worry about other files in the css directory.
- The
jsdirectory contains JavaScript code necessary for animations, pop-ups, alerts, and other visual effects, as described here. We aren't ready to implement JavaScript in our projects yet so we won't worry about this directory for now.
Adding a Downloaded Copy of Bootstrap to a Project
To integrate Bootstrap into our project, we simply need to move bootstrap.css into the css directory of the project we're working on. This would be a good time to practice the $ mv command in the terminal, though it's also fine to drag and drop the file.
Once the Bootstrap stylesheet is located in our css folder, we need to link to it in our site's <head> tags, just as we do with our own stylesheets:
...
<head>
  <link href="css/bootstrap.css" rel ="stylesheet" type="text/css" media="all">
  <link href="css/styles.css" rel="stylesheet" type="text/css" media="all">
  <title>Media Queries</title>
</head>
...
(Note: When you see ellipses (...) in a code snippet, it means portions of the file were omitted from the example. This keeps examples brief, making it easier to identify the new code that has been added.)
As we see here, we can link to multiple stylesheets. However, it's very important that our stylesheet is listed after the Bootstrap stylesheet. This way, the rules in our stylesheet will override rules that have the same name in the Bootstrap stylesheet. We'll cover this further in a future lesson.
Linking to a CDN
We can also add Bootstrap into a project via a content delivery network, or CDN. This is the option explained in the "Quick start" section on Bootstrap's introduction page.
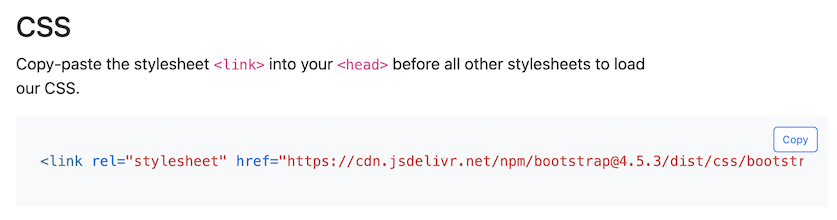
A content delivery network is exactly what it sounds like — a network of servers that make content available for users. In this case, Bootstrap is making its stylesheets available online, which means we can just load the online version directly to our project without needing to add any files to our css directory.
We can copy/paste the <link> directly into the <head> tags of our sites. This is similar to the manner we've been linking our stylesheets so far. The only difference is that the href property refers to an online location instead of a location in our css directory:
...
<head>
  <link rel="stylesheet" href="https://cdn.jsdelivr.net/npm/bootstrap@4.5.3/dist/css/bootstrap.min.css" integrity="sha384-TX8t27EcRE3e/ihU7zmQxVncDAy5uIKz4rEkgIXeMed4M0jlfIDPvg6uqKI2xXr2" crossorigin="anonymous">
  <link href="css/styles.css" rel="stylesheet" type="text/css" media="all">
  <title>Media Queries</title>
</head>
...
A Few More Notes about Using a CDN
What are the integrity and crossorigin Attributes?
The integrity and crossorigin attributes are used for Subresource Integrity (SRI) checking. According to srihash.org, SRI checking allows browsers to ensure that resources hosted on third-party servers (like Bootstrap's CSS library that we are accessing via CDN) have not been tampered with. Performing SRI checking is a best practice set by W3C, the World Wide Web Consortium, an international organization that sets standards for the web.
Note, you do not need to retain any of the above information. However, it is interesting and you are welcome to read more on your own!
What's the <script> Tag?
If you scrolled down to the JS section of the Bootstrap introduction page, you may have noticed some <script> tags:
<script src="https://code.jquery.com/jquery-3.5.1.slim.min.js" integrity="sha384-DfXdz2htPH0lsSSs5nCTpuj/zy4C+OGpamoFVy38MVBnE+IbbVYUew+OrCXaRkfj" crossorigin="anonymous"></script>
<script src="https://cdn.jsdelivr.net/npm/bootstrap@4.5.3/dist/js/bootstrap.bundle.min.js" integrity="sha384-ho+j7jyWK8fNQe+A12Hb8AhRq26LrZ/JpcUGGOn+Y7RsweNrtN/tE3MoK7ZeZDyx" crossorigin="anonymous"></script>
The <script> tag lets us add executable code to our HTML, like JavaScript. These specific script tags let us use Bootstrap's JavaScript library in our project (which we source via the CDN), as well as the jQuery library, which Bootstrap's JavaScript library depends on.
We'll learn all about JavaScript and the <script> tag in the next section. For now, it's helpful to know that JavaScript enables interactivity for webpages, like visual effects or animations. Because of this, many Bootstrap elements require JavaScript. Examples include dropdown menus, modal windows, and so on. If you'd like to see an example, check out this demo of a Bootstrap modal that uses JavaScript. Make sure to click the button "Launch demo modal".
Since we won't begin exploring JavaScript until the next section, we recommend holding off on adding any JavaScript features for now. This means you do not need to include the <script> tags in your project's <head> tags. Also, you will never be expected to add any Bootstrap JavaScript features for an independent project at Epicodus, so it's up to you if you eventually want to explore them further.
If you do want to explore JavaScript features, the easiest way to do this is to include the CDN link to jQuery and to Bootstrap's JavaScript file in the <head> tags of your HTML document.
To learn which elements require JavaScript, visit Bootstrap's JavaScript Documentation. Make sure to select the drop down that says "Show components requiring JavaScript".
Final Thoughts
If we use a CDN, we have to have an internet connection for it to work — otherwise our project won't be able to access the content. Overall, though, CDNs are a great way to go — they are very fast and reliable.
Ultimately, both approaches we mention above work well. Now that we know how to add Bootstrap to our own projects, we're ready to start working with Bootstrap styles.