✏️ 1.1.1.3 Practice: GitHub Remote Repositories
The main version of our Hello World website is saved on the machines that we used to code the HTML file, hello-world.html. It is also being tracked by Git in the local .git repository. When we want to publish our code to the world (or just save it on the cloud so we can access it from any device), we want to store it in a remote repository. In this lesson, we'll dive in to using GitHub to store our code remotely.
First, let's talk about the difference between local and remote. When we talk about a local repository, we mean one that is accessible only when using the device where it is saved. For example, the projects that you build on Epicodus machines have local .git repositories. If you want to see your code on another device, you will not be able to access it. A remote repository is one that is saved in a location outside of your device but still accessible by it. We will be saving our code remotely to repositories on GitHub.
Let's copy our local .git repository to a remote repository on GitHub now.
Creating a GitHub repository
First, we need to create the remote repository on GitHub. Each pair partner creates a remote repository using their own GitHub account.
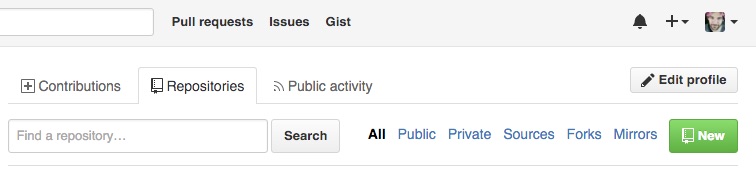
Once logged in, we'll select the New Repository or New button to go to the Create a new repository screen:

Let's walk through the options we need to complete for our new repository.
First, we enter the repository name that matches the name of our project directory. For this project, we'll enter "hello-world". Though the description is optional, it can be helpful to our future selves and anyone else looking at our repository to see a quick description of its content.
You can have public or private repositories. A public repository means that everyone can see the contents of the repository but as the owner of it, you will be the only person who can determine what code can be committed to it. A private repository is one that only you can see. We require that you set the repositories you create at Fidgetech to public so that your instructors can see your work and so you can show your journey as a developer through your code.
The last option asks whether or not to initialize the repository with a README. A README file is a detailed description of the repository including information like authors, usage instructions and licensing. Do not check this box. We will be exploring what a README is and how we add it to our repositories in a future lesson.
Pushing to GitHub
With an empty repository awaiting our code, we can now follow the steps to push our code from our local repository to the remote repository.
In our project directory, we will make sure our code is working. In this case, we open it in the browser and it looks good. We also ensure that there aren't any outstanding changes that we still need to commit:
$ git status
Now we need to tell Git where our remote repository is by providing the web address. We'll use the git remote command.
$ git remote add al https://github.com/ada-lovelace/hello-world
This command tells Git to store information about a remote repository that we gave the nickname, al (the initials for our user in this example - Ada Lovelace) located at https://github.com/epicodus-lessons/hello-world. We could use any nickname for the remote but we've chosen al for brevity and to be consistent with the initials that we use if we are pair programming.
Note that your command should contain the URL location for your GitHub repo. Ours is https://github.com/epicodus-lessons/hello-world in the example above, but yours will likely differ.
To see that Git has done this successfully, we can run this command:
$ git remote -v
al https://github.com/ada-lovelace/hello-world
This shows us all the remotes stored in Git for this project. In this case, we only have one, with the nickname al.
To push our code, which means we are copying it from the local to the remote, we run this command:
$ git push al main
This indicates that we should push code to the remote with the nickname al from the main branch. The main branch is now the default branch in git. The default branch used to be called the master branch in the past. However, GitHub has since updated the name due to the racist connotations of the term master when used in the programming industry. We strongly support this shift.
In the future, we'll see that we can have many copies of a repository on our local machines all in different stages of development. The main is always considered the main copy. Remember that the term master and main are technically interchangeable — but one doesn't have negative connotations while the other does.
For security reasons, only the owner of the remote GitHub repository is able to push code to it. This means that we need to enter our login information to confirm our ownership. That means we need to enter our username as well as a personal access token (PAT). To review the instructions on creating a PAT, see Creating and Using a Git PAT. Once we've entered our credentials, our code is copied to the GitHub repository and we can see it online if we go to our GitHub repository URL https://github.com/ada-lovelace/hello-world. We can see the file structure and the commits in GUI form that we saw in our terminal. Note that the URL above is just an example that doesn't exist — your personal URL will be different.
Cloning from GitHub
So, how do we get our code back to our local from the remote? What if we push our code up to GitHub at Epicodus and want to work on it at home on our personal devices? To do this, we'll need to clone our GitHub repository on our local machines.
To practice this, let's delete our hello-world project directory and clone it again from GitHub. To delete a whole directory, we can't be in it so we'll go up a directory level and then remove it:
$ cd ..
$ rm -rf hello-world
Poof! Gone. Now, if we want to copy it in the exact same location from GitHub, we get the URL for the remote repository and run:
$ git clone https://github.com/ada-lovelace/hello-world
As long as it's a public repository (and it probably will be), you won't need to enter your credentials. If it's a private repository, you will need to enter your credentials (if they aren't saved in a credential manager yet).
Now an ls shows us our directory is there with our code file in it. Let's go into the project directory:
$ cd hello-world
If we do a git log, we see that our commit history arrived with our directory and code.
If we run git remote, we also see that our newly created local .git repository is automatically linked — with the nickname origin — to the remote repository from which we cloned.
$ git remote
origin
If we make changes to the code and want to push again, we would be able to use the origin nickname that came with the repository from GitHub (e.g. git push origin main).
Note: only one location can be designated with the nickname "origin". So, if we clone one project but want to push to two different repositories, they cannot both be nicknamed "origin". That is another good reason to use your initials as the nickname of the remote repository.
Whew! This has been a mountain of Git concepts and terminology to explore. Don't try and memorize this information. Use the cheat sheets for reference to walk through set up and usage in your projects to come. Before you know it, it'll become ingrained in your daily workflow.
Be sure that you are not cloning a project inside of an existing local repository. In other words, you should not be inside of a project directory when you run the git clone command. Otherwise you'll end up with one git repository inside of another.
Forking
If you're working with a pair, you might get a little jealous with all your co-authored code showing up on your pair's Github account. Don't worry, you can add the project to your account by forking the repository.
When you're done working on a project with your pair and you've made your last push to your pair's account, visit the repository on Github (eg https://github.com/your-pairs-name/hello-world). In the upper right corner, click Fork. The image below shows what the Fork button should look like.

After GitHub does it's magic, you'll have a copy of the repo in your account.
Take note! If one of you makes a new commit and pushes it to your account, the change won't be reflected in the other one's account. You'll learn later how to keep your forked repositories in sync.
Copying a Project
Alternatively, if you want to have the project show up in your account as a repository and not as a fork, you can clone the project from your pair's account and then push it to your account. You'll need to remove the remote and add your own remote to do this. Here are the steps:
- Go to the account of the person that currently has the repository for the project. Clone the project to your desktop.
- Create a new project in your Github account. Then click the green "Clone or download" button and copy the link provided.
- Go to the top level of the project directory of the project you cloned (from your pair's repository) in the terminal.
- Check the remote repository with the command
git remote -v. You'll see something similar to the following code. The first word is the identifier for the remote repo, and the URL for the remote repo follows the identifier. In the following example, the identifier isorigin, but it might be the owner's initials or something else.
origin https://github.com/OWNER/REPOSITORY.git (fetch)origin https://github.com/OWNER/REPOSITORY.git (push)
- To remove a remote repo, enter the command
git remote rm <identifier>where<identifier>is the remote's identifier.
- If the identifier is
origin, then the command will begit remote rm origin. - If the identifier is
fpk, you'd dogit remote rm fpk. - Note that
rmis a Git command for "remove".
- Confirm that the remote has been removed by entering
git remote -vagain. Nothing should show up. That means the remote has been removed. If it hasn't been removed correctly, return to step 4. - Enter
git remote add origin [your-project-url-here]. You can use an identifier other thanorigin. Make sure that you put in the project URL that you copied from the repository you created in your account here. - You can confirm that the new remote is correctly linked with
git remote -v. - Once the remote is correctly linked to the repository in your account, you can push the code to your repository.
In order for your contributions to show up in Github (you'll learn more about Github contributions soon), you'll need to add any repositories where you have contributions to your account. Either forking or copying the project to your account will ensure that the project shows up in your Github contributions. They'll also be easily available for you to use and for others to see in your account. This is also helpful if you need access to a repository later — either because you want to work on it further or if you want to use it as a learning reference. If the original repository is deleted by your pair, you won't lose access as well.
Make sure you always fork or copy over projects you work on at the end of the day.