📓 4.2.3.8 Updating a Ticket
In this lesson, we'll add the final piece of CRUD functionality to our Help Queue: the ability to update a ticket.
Planning the Component Structure
Before we start coding, let's think about where EditTicketForm should live. We'll make it a direct child of TicketControl:
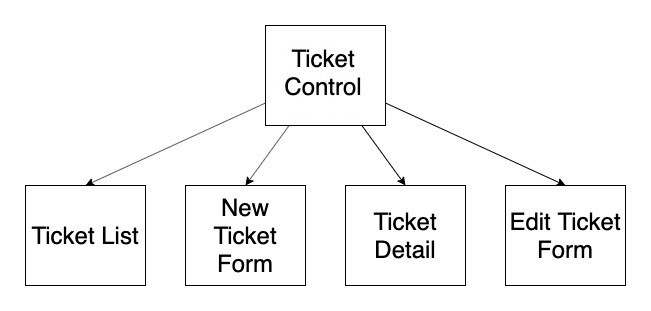
Why this placement?
TicketControlalready manages stateTicketControlalready handles conditional rendering- Props only need to be passed down one level to
EditTicketForm
This isn't the only valid approach, but it's straightforward and builds on patterns we've already established.
The Two Behaviors We Need
Let's think about this from the user's perspective:
Behavior 1: Navigate to the edit form
When viewing a ticket's details, clicking "Update Ticket" shows an edit form.
Behavior 2: Submit the edit
When the edit form is submitted, the ticket updates and the user returns to the ticket list.
We'll implement these one at a time.
Behavior 1: Toggle the Edit Form
Our Roadmap
- Add an
editingstate variable toTicketControl - Add a
handleEditClickfunction toTicketControl - Pass
handleEditClicktoTicketDetailas a prop - Add an "Update" button to
TicketDetail - Create a placeholder component to represent the edit form
- Update conditional rendering in
TicketControlto show the edit form
Step 1: Add the editing State Variable
Add a new state variable to track whether we're in "edit mode":
const [formVisibleOnPage, setFormVisibleOnPage] = useState(false);
const [mainTicketList, setMainTicketList] = useState([]);
const [selectedTicket, setSelectedTicket] = useState(null);
const [editing, setEditing] = useState(false); // Add this line
We initialize editing to false because we don't want to show the edit form until the user goes to update a ticket.
Step 2: Write the handleEditClick Function
Add a handleEditClick function to TicketControl to handle when the user clicks "Update Ticket". This function simply flips editing to true:
const handleEditClick = () => {
  setEditing(true);
};
Step 3: Pass handleEditClick to TicketDetail
Update the conditional rendering in TicketControl to pass our new handleEditClick function as a prop to TicketDetail so that TicketDetail can call it when the user clicks the "Update Ticket" button:
if (selectedTicket !== null) {
  currentlyVisibleState = (
    <TicketDetail
      ticket={selectedTicket}
      onClickingDelete={handleDeleteTicket}
      onClickingEdit={handleEditClick} // Add this line
    />
  );
  buttonText = "Return to Ticket List";
}
Step 4: Add an "Update" Button to TicketDetail
Now update TicketDetail to use the new prop:
import React from "react";
import PropTypes from "prop-types";

function TicketDetail(props) {
  const { ticket, onClickingDelete, onClickingEdit } = props; // Destructure onClickingEdit

  return (
    <React.Fragment>
      <h1>Ticket Detail</h1>
      <h3>{ticket.location} - {ticket.names}</h3>
      <p><em>{ticket.issue}</em></p>
      <button onClick={onClickingEdit}>Update Ticket</button> {/* Call onClickingEdit when clicked */}
      <button onClick={() => onClickingDelete(ticket.id)}>Close Ticket</button>
      <hr />
    </React.Fragment>
  );
}

TicketDetail.propTypes = {
  ticket: PropTypes.object,
  onClickingDelete: PropTypes.func,
  onClickingEdit: PropTypes.func // Add PropType for onClickingEdit
};

export default TicketDetail;
onClickingEdit doesn't need an arrow function wrapper because we're not passing any arguments. So we can just write onClick={onClickingEdit}.
At this point, clicking "Update Ticket" will set editing to true. You can verify this in React DevTools.
Step 5: Create the EditTicketForm Component
Create a new file EditTicketForm.js in the src/components directory. For now, we'll just make it a placeholder that uses our existing ReusableForm component:
import React from "react";
import ReusableForm from "./ReusableForm";

function EditTicketForm() {
  return (
    <React.Fragment>
      <ReusableForm buttonText="Update Ticket" />
    </React.Fragment>
  );
}

export default EditTicketForm;
The "Update Ticket" button won't work correctly yet — we'll wire that up in Behavior 2.
Step 6: Add Conditional Rendering for the Edit Form
First we need to add an import line for EditTicketForm at the top of TicketControl:
import EditTicketForm from './EditTicketForm';
Now add a new conditional at the top of the rendering logic in TicketControl, so that when editing is true, we show the EditTicketForm:
import EditTicketForm from './EditTicketForm';

// ... inside TicketControl function

let currentlyVisibleState = null;
let buttonText = null;

if (editing) {
  currentlyVisibleState = (
    <EditTicketForm ticket={selectedTicket} />
  );
  buttonText = "Return to Ticket List";
} else if (selectedTicket !== null) {
  currentlyVisibleState = (
    <TicketDetail
      ticket={selectedTicket}
      onClickingDelete={handleDeleteTicket}
      onClickingEdit={handleEditClick}
    />
  );
  buttonText = "Return to Ticket List";
} else if (formVisibleOnPage) {
  // ... rest of conditionals
}
Why check editing first? When editing, both editing is true AND selectedTicket is not null. We need to check editing first so we show the form instead of the detail view.
Test it! You should be able to:
- Click a ticket to see its details
- Click "Update Ticket" to see the edit form
- Click "Return to Ticket List" to go back
The form won't actually update anything yet; that's Behavior 2.
Behavior 2: Editing a Ticket
Now let's make the form actually work.
Our Roadmap
- Write
handleEditTicketinTicketControl - Pass it to
EditTicketForm - Add form submission handling to
EditTicketForm
Step 1: Write the handleEditTicket Function
Add a handleEditTicket function in TicketControl. This handler needs to:
- Replace the old ticket with the edited one
- Clear
selectedTicketandeditingto return to the list
const handleEditTicket = (ticketToEdit) => {
  // Create a new ticket list array, removing the old ticket and adding the edited one
  const editedTicketList = mainTicketList
    .filter(ticket => ticket.id !== selectedTicket.id)
    .concat(ticketToEdit);

  // Update state - replace the old ticket list with the new one
  setMainTicketList(editedTicketList);

  // Exit editing mode
  setEditing(false);
  setSelectedTicket(null);
};
Breaking this down:
const editedTicketList = mainTicketList
  .filter(ticket => ticket.id !== selectedTicket.id)  // Remove old version
  .concat(ticketToEdit);                               // Add new version
We're not directly mutating the ticket — we're replacing it entirely. This is a common pattern in React: filter out the old, add the new.
Writing each chained method on its own line (.filter() then .concat()) makes the code easier to read. It works exactly the same as writing it all on one line.
Using filter().concat() moves the edited ticket to the end of the list. If you need to preserve the ticket's position, you could use map() instead:
// ternary operator inside map
// if ticket.id matches, use ticketToEdit; otherwise, keep the original ticket
const editedTicketList = mainTicketList.map(ticket =>
  ticket.id === selectedTicket.id ? ticketToEdit : ticket
);
This replaces the matching ticket in place. Both approaches are valid - choose based on whether order matters in your application.
Step 2: Pass the Function to EditTicketForm
Update the conditional in TicketControl to pass our new function to EditTicketForm:
if (editing) {
  currentlyVisibleState = (
    <EditTicketForm
      ticket={selectedTicket}
      onEditTicket={handleEditTicket}
    />
  );
  buttonText = "Return to Ticket List";
}
Step 3: Complete the EditTicketForm Component
Now we add the form submission logic:
import React from "react";
import PropTypes from "prop-types";
import ReusableForm from "./ReusableForm";

function EditTicketForm(props) {
  const { ticket, onEditTicket } = props;

  function handleEditTicketFormSubmission(event) {
    event.preventDefault();
    onEditTicket({
      names: event.target.names.value,
      location: event.target.location.value,
      issue: event.target.issue.value,
      id: ticket.id
    });
  }

  return (
    <React.Fragment>
      <ReusableForm
        formSubmissionHandler={handleEditTicketFormSubmission}
        buttonText="Update Ticket"
      />
    </React.Fragment>
  );
}

EditTicketForm.propTypes = {
  ticket: PropTypes.object,
  onEditTicket: PropTypes.func
};

export default EditTicketForm;
Walking through this:
- We import
PropTypesand acceptpropsas a parameter. Our placeholder didn't need these, but now we're using actual data - We destructure
ticketandonEditTicketfrom props handleEditTicketFormSubmissiondoes three things:- Prevents the default form submission behavior
- Builds a ticket object from the form values
- Calls
onEditTicket(which is reallyhandleEditTicketinTicketControl)
- We pass
handleEditTicketFormSubmissiontoReusableFormso it runs on submit
Key detail: We use ticket.id to preserve the original ID. The form provides new values for names, location, and issue, but the ticket keeps its id.
Fixing the Last Bug
Try this sequence:
- Click a ticket
- Click "Update Ticket"
- Click "Return to Ticket List"
- Click another ticket and try to edit it
You'll get an error! The problem is in handleClick:
const handleClick = () => {
  if (selectedTicket !== null) {
    setFormVisibleOnPage(false);
    setSelectedTicket(null);
    setEditing(false);  // Add this line!
  } else {
    setFormVisibleOnPage(!formVisibleOnPage);
  }
};
What was happening: When clicking "Return to Ticket List" from the edit form, selectedTicket was cleared but editing stayed true. The next time you tried to edit, the form tried to render without a valid ticket.
Recap: The Complete Help Queue
We now have full CRUD functionality! Here's how our components work together:
| Component | State | Responsibilities |
|---|---|---|
TicketControl | mainTicketList, selectedTicket, formVisibleOnPage, editing | Manages all shared and local state; decides which view to render; provides handler functions to child components |
TicketList | None | Renders all tickets; passes click handler to each Ticket |
Ticket | None | Renders one ticket's summary; calls handler when clicked |
TicketDetail | None | Renders full ticket info; has Update and Delete buttons |
NewTicketForm | None | Captures form input; calls handler to create ticket |
EditTicketForm | None | Captures form input; calls handler to update ticket |
ReusableForm | None | Renders form fields; shared by New and Edit forms |
Notice that TicketControl holds all the state, and every other component is stateless — they just receive props and call handlers.
A Note on Complexity
Take a look at the conditional rendering logic in TicketControl:
if (editing) {
  // show EditTicketForm
} else if (selectedTicket !== null) {
  // show TicketDetail
} else if (formVisibleOnPage) {
  // show NewTicketForm
} else {
  // show TicketList
}
This works, but it's fragile. The order matters — if you check selectedTicket before editing, the edit form won't show. We're using three different variables (editing, selectedTicket, formVisibleOnPage) to control one thing: which view is visible.
A cleaner approach might be a single currentView variable set to 'list', 'detail', 'edit', or 'newTicket'. We didn't do that here because we built the app incrementally, adding state as needed. That's realistic - code often evolves this way.
As you build your own applications, watch for this kind of complexity creeping in. It's a signal that refactoring might be worthwhile.
Summary
In this lesson, we added several behaviors to our Help Queue application. First, we planned out the new behaviors our application needs and listed all the steps we need to take to implement these behaviors. While it's not necessary to write down all of these steps, it can be helpful for newcomers to React.
Next, we added functionality to show an edit form (local state) and then update a ticket in our mainTicketList (shared state). Once again, we had to deal with a lot of little pieces. It may even seem like we needed to add a huge and overly complicated amount of code when we could do a fairly simple implementation with vanilla JS.
However, we've written dynamic, modular and scalable code that lends itself well to further expansion. If all the steps are still overwhelming, trust the process — learning a new library or framework is always challenging and React is no different. In a few weeks, working with these concepts will become second nature.