📓 3.3.1.3 Using SQL Designer
In this lesson, we'll walk through the process of using SQL Designer, a simple tool for creating and visualizing SQL database relationships.
Using SQL Designer
First, we'll cover the basic layout of SQL Designer.
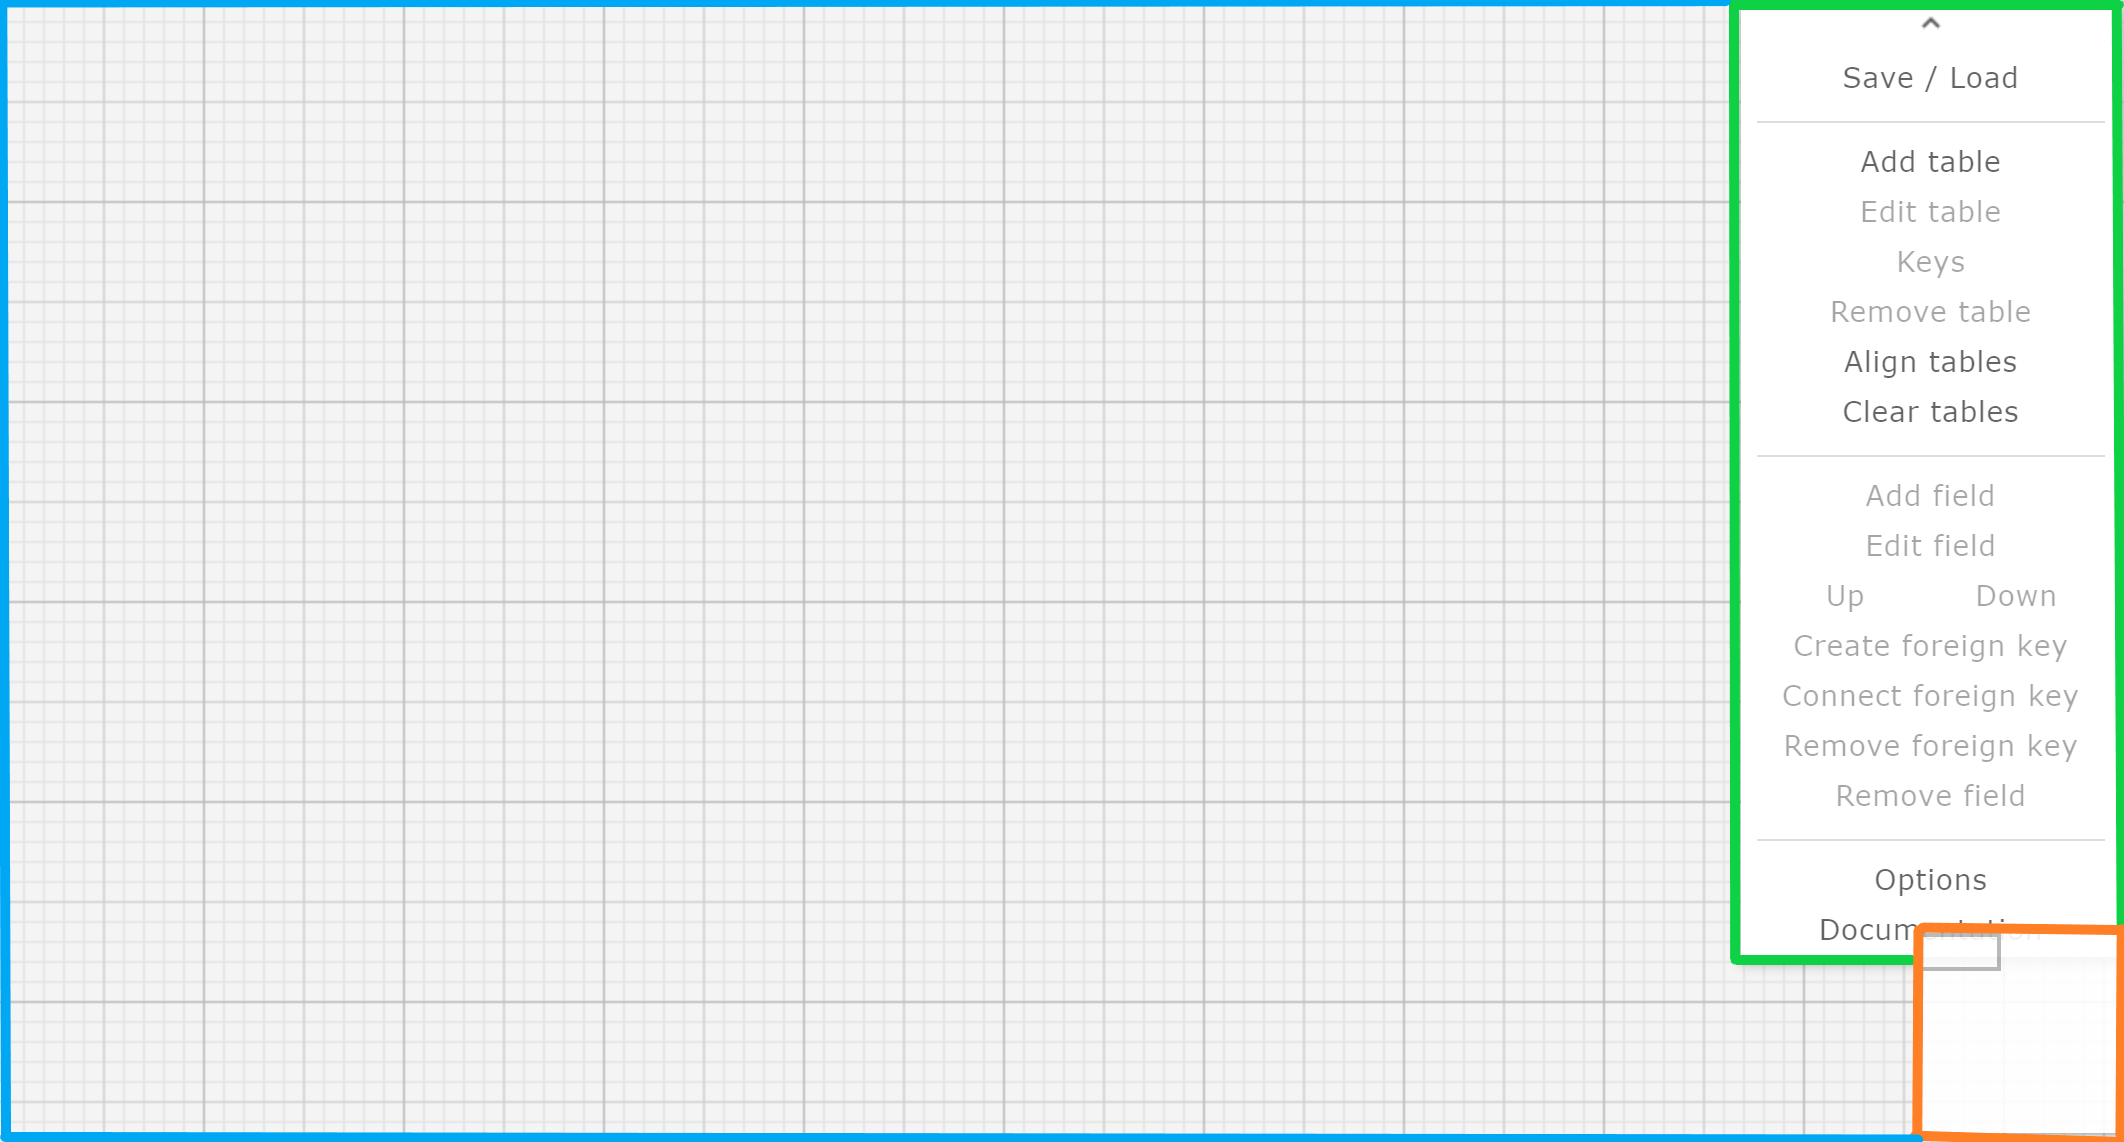
- You can find the actions for your design space in the area outlined in the green box above.
- The blue box is your current design space. You can add and edit items anywhere on the page.
- The orange box is your whole page display. Inside this display, there's another rectangle which shows your view and where you are in your current design space relative to the whole page.
Adding Tables
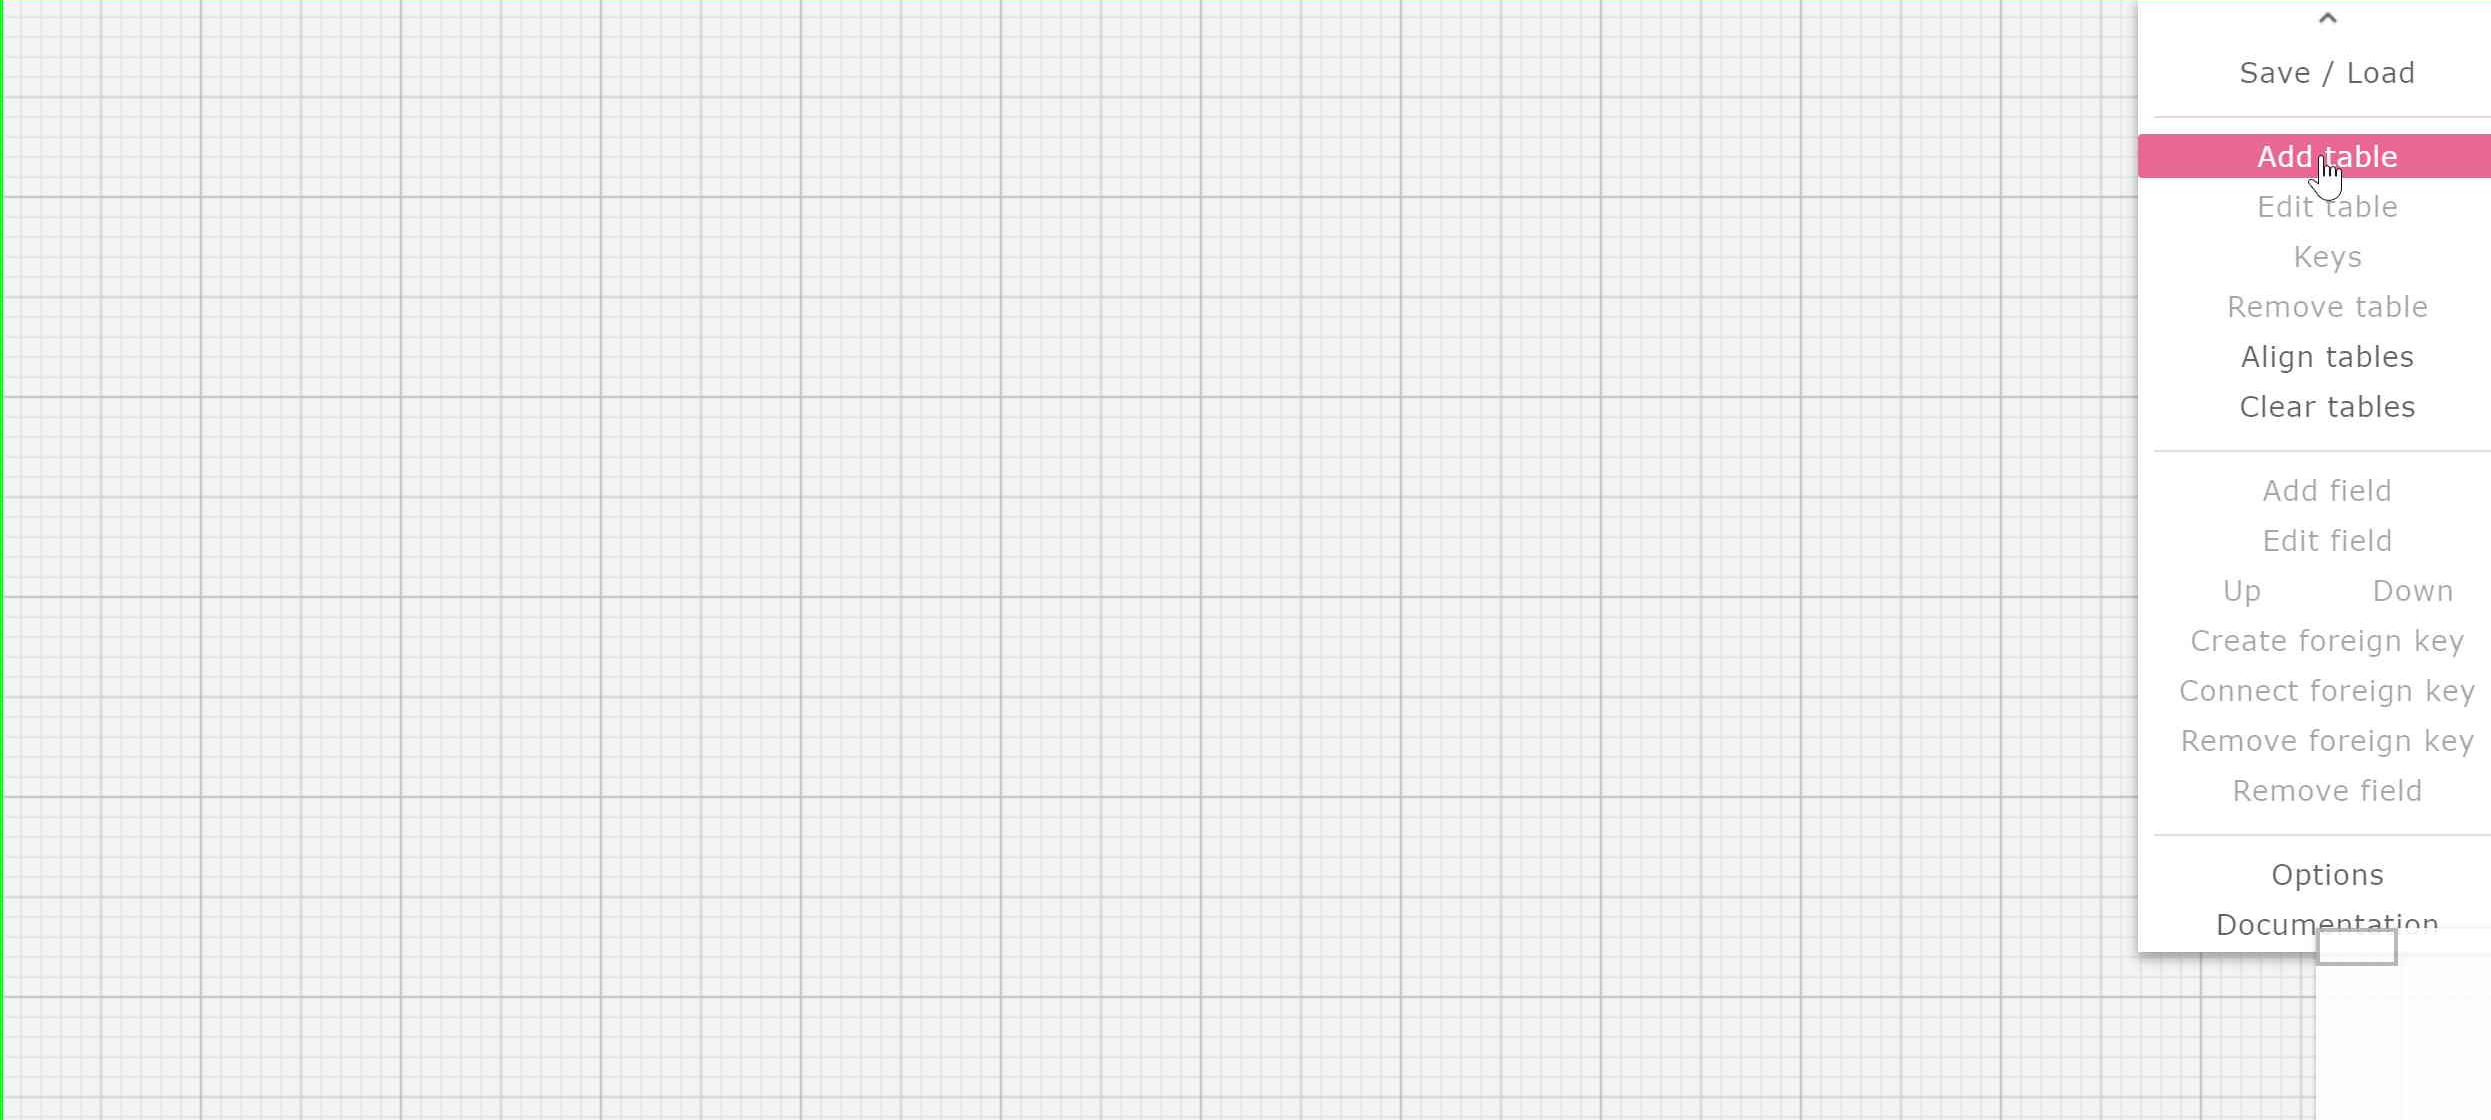
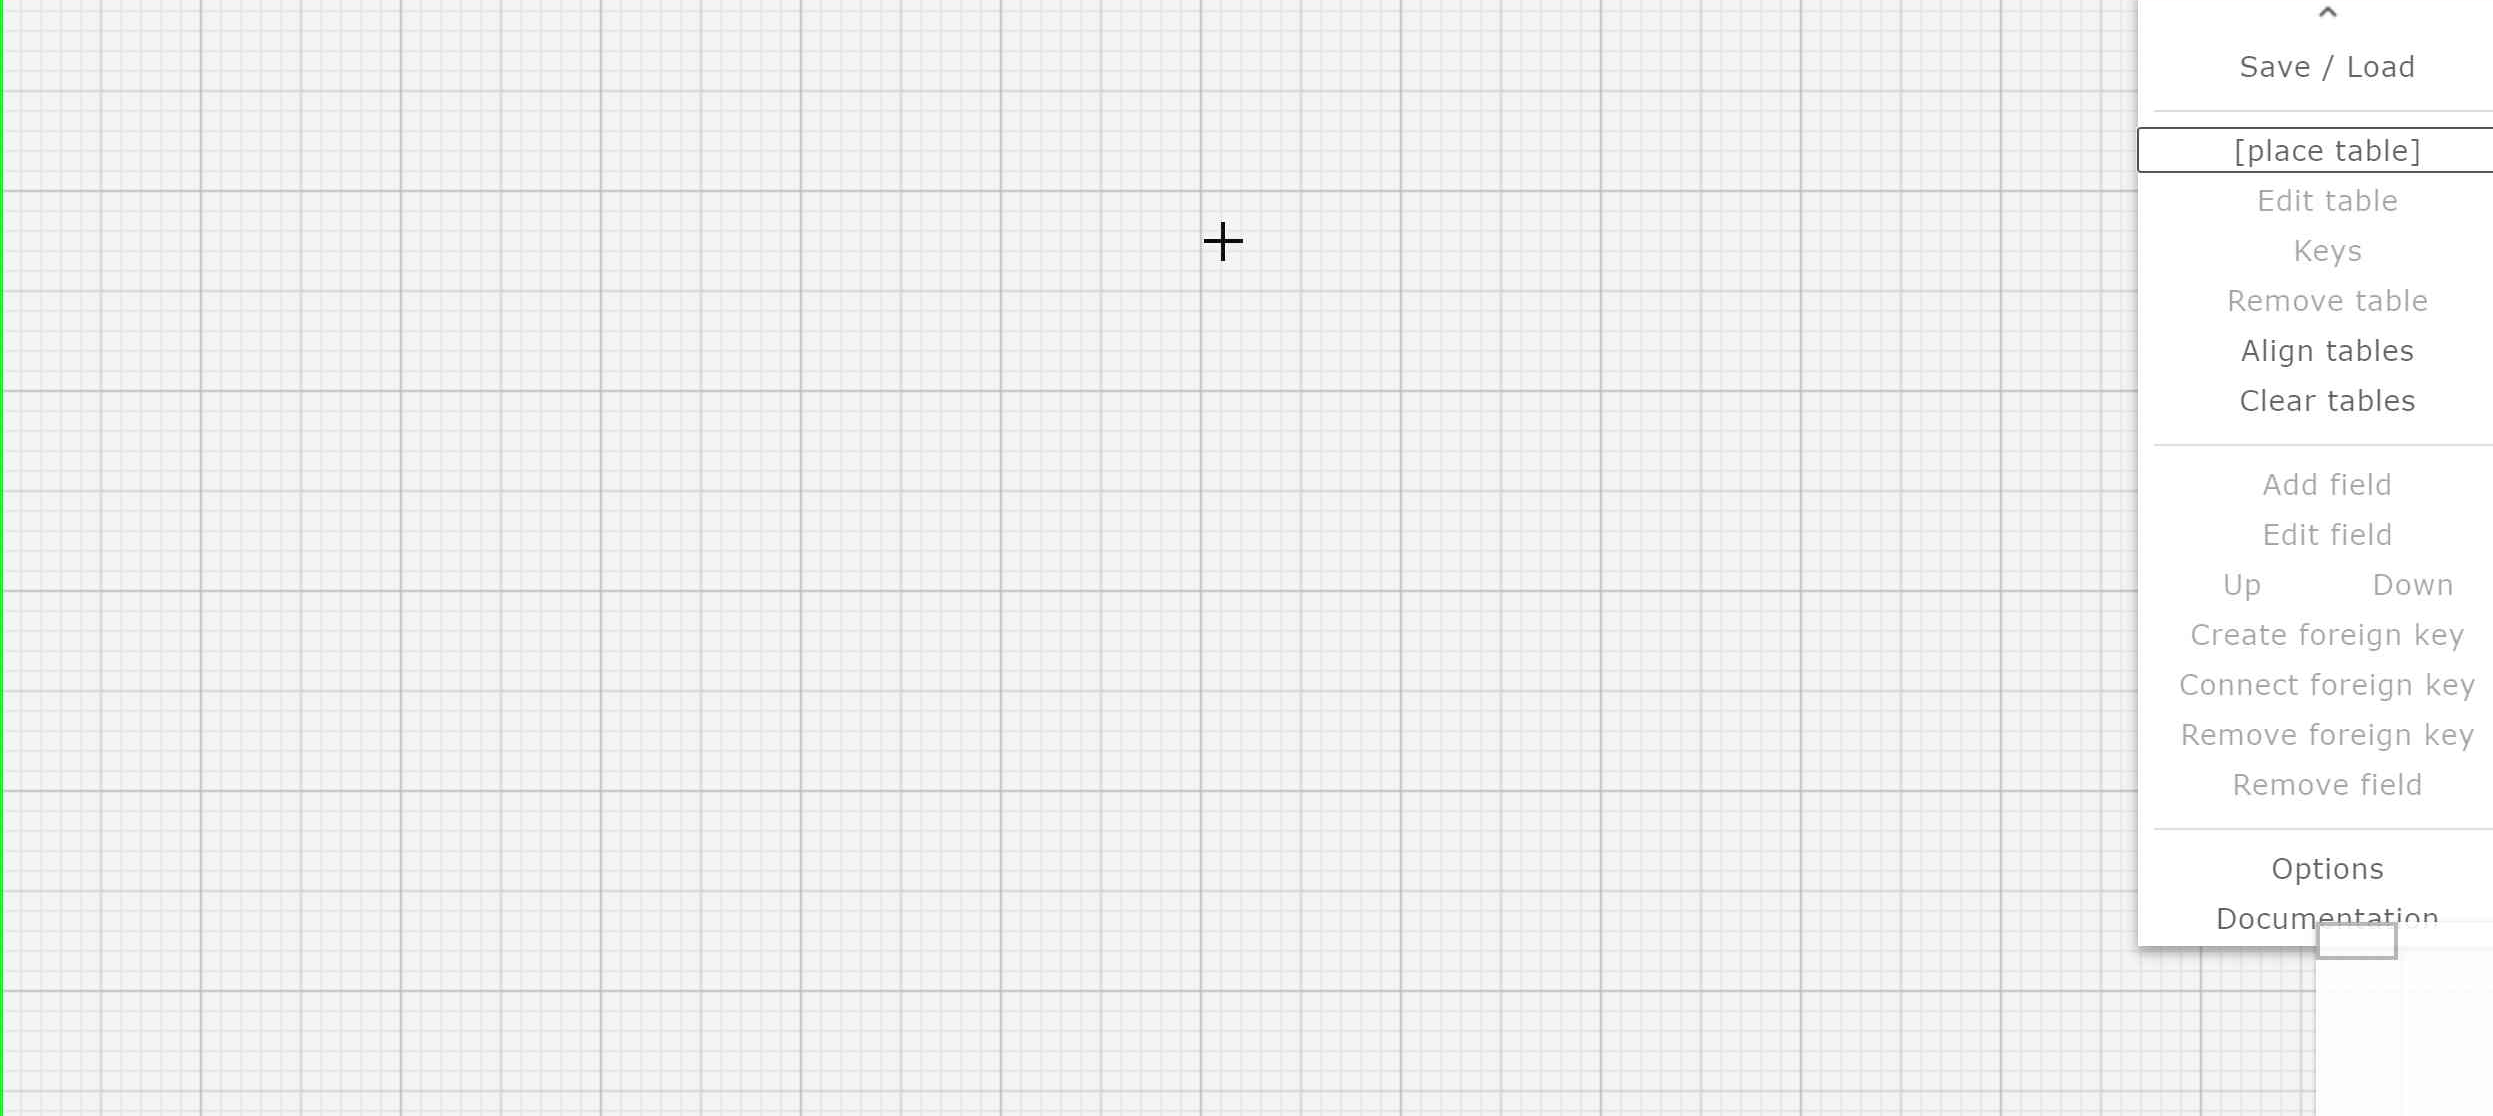
To add a table, click the Add Table action and then use the pointer (which looks like a +) to click where you would like to add a table on the page. Do not click and drag the new pointer on the grid.. Doing so will create a visible rectangle but won't correctly size the table.
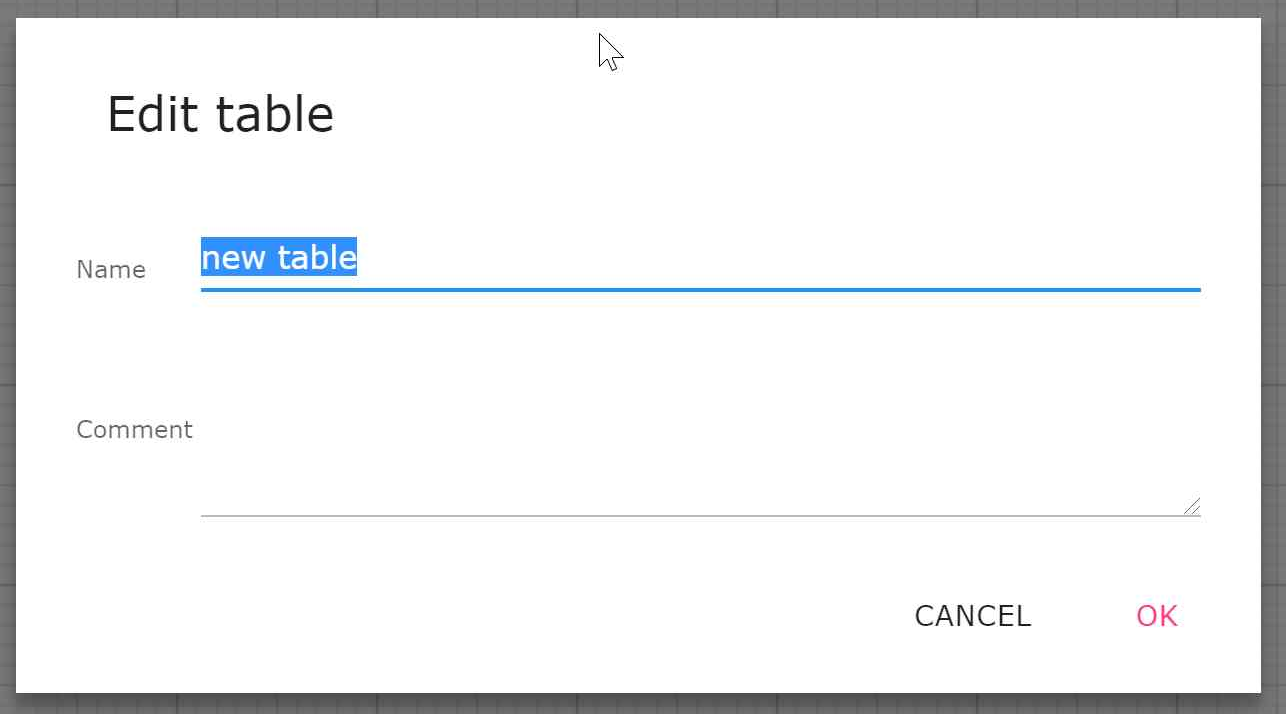
A dialog box will appear once you've clicked the grid. You can add your table name here. Follow the SQL syntax for your table names based on the specifications you've learned in class.
Add Attributes
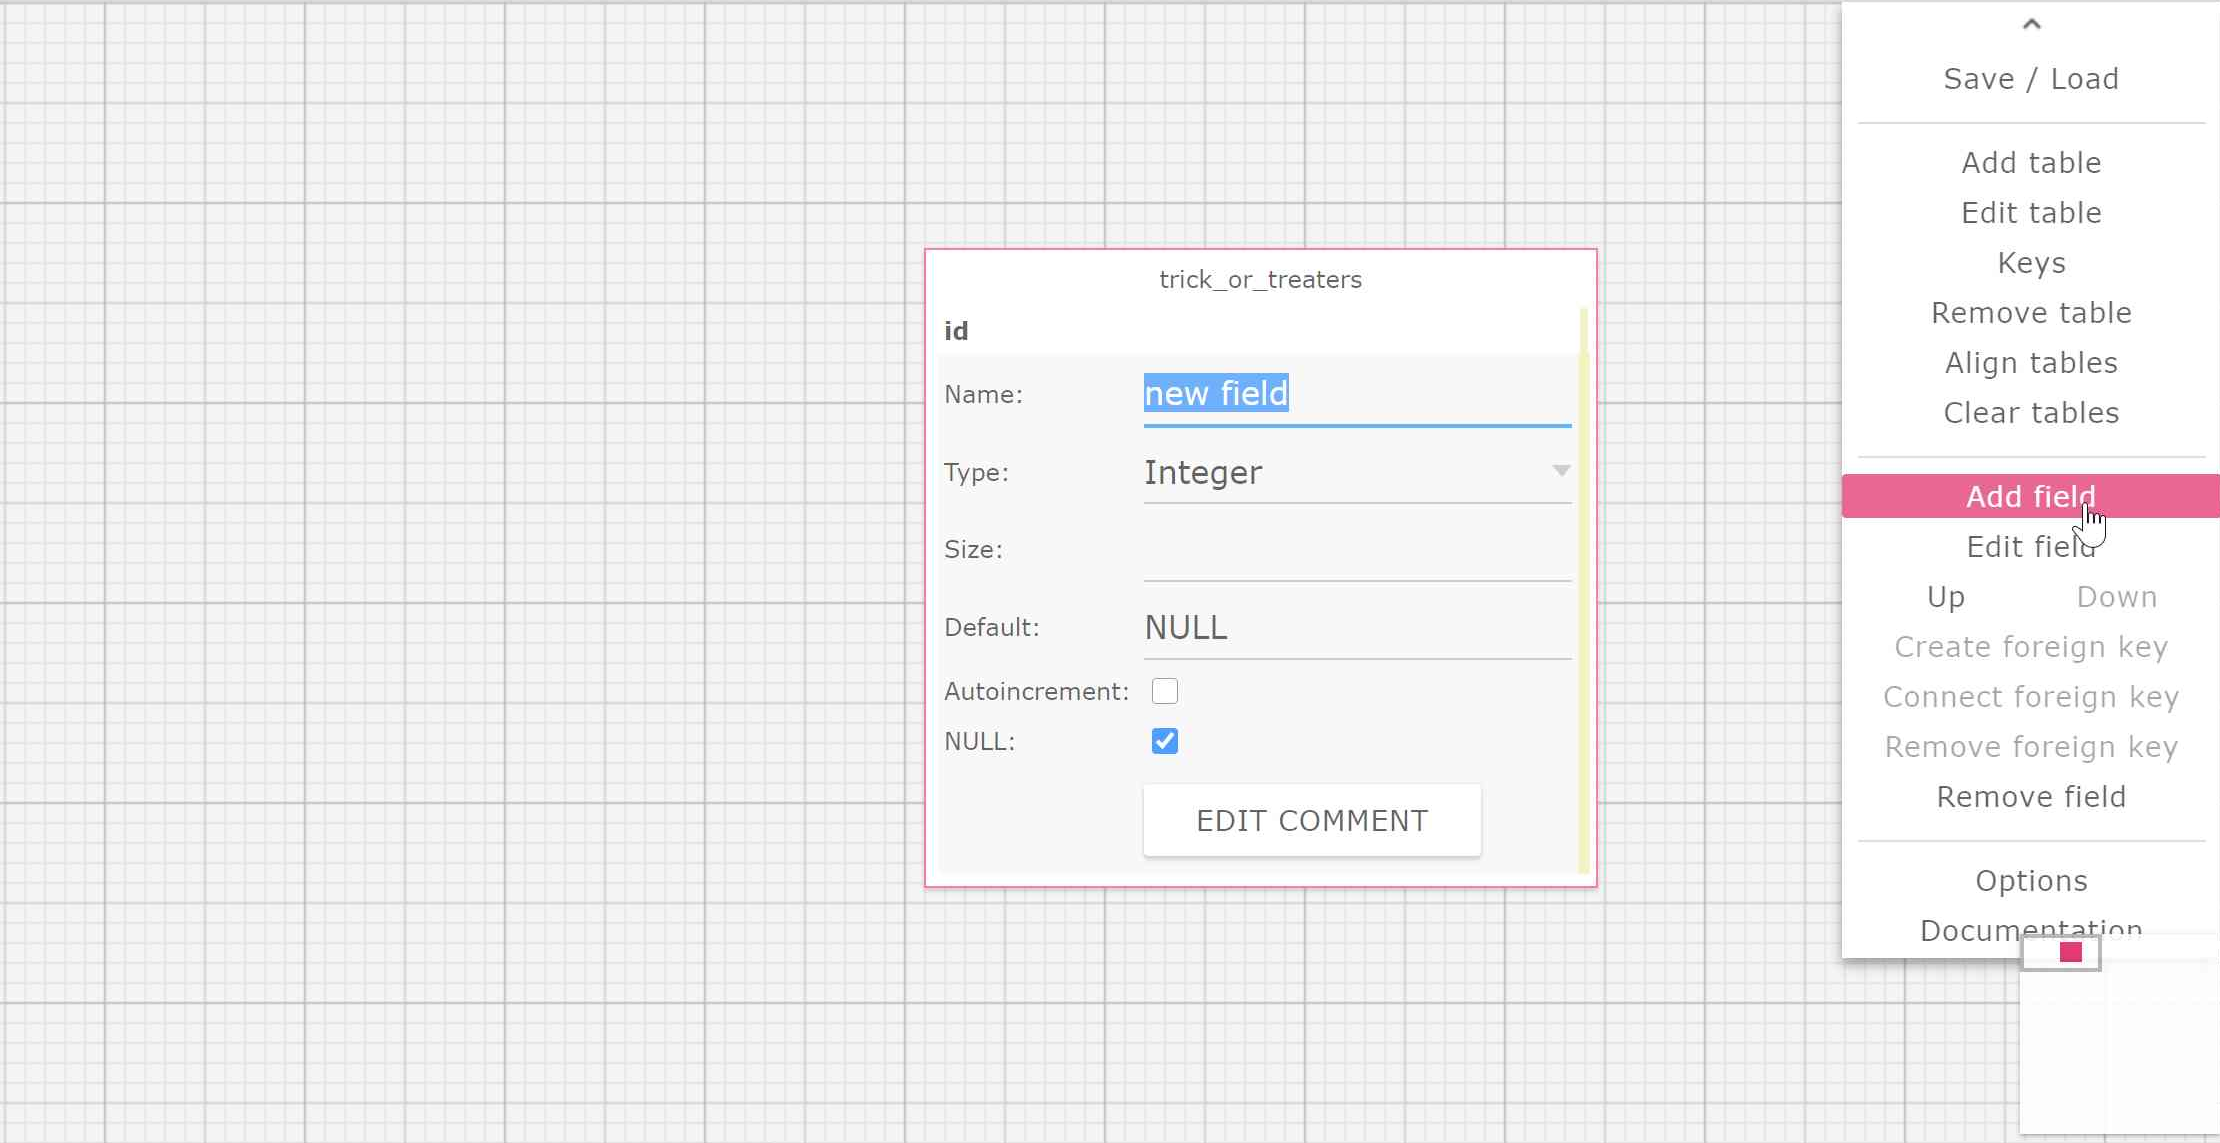
To add a field, click on a table and then click the Add field action. A dialog box will appear. Enter the attribute name and type here.
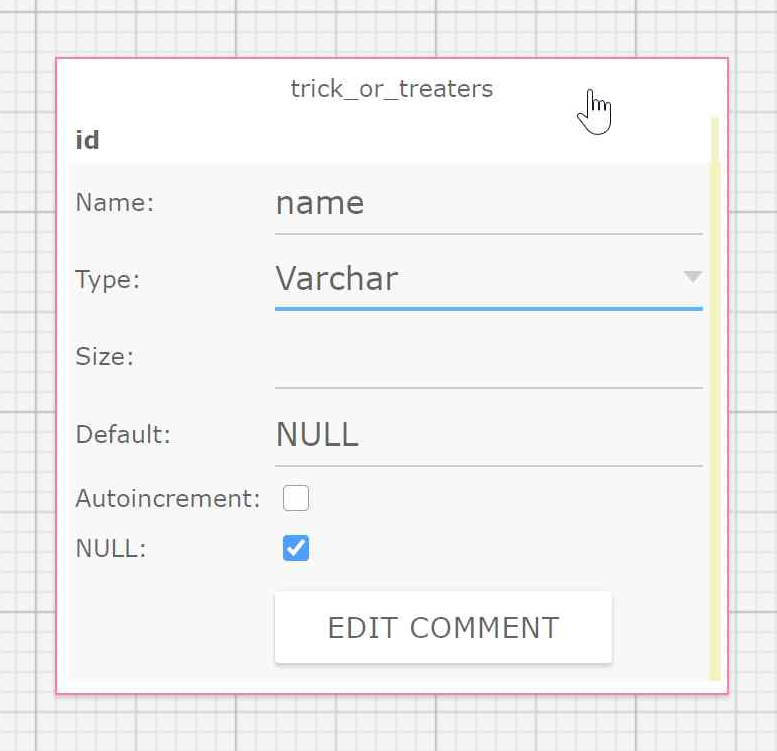
To save the field, you can do one of the following:
- Press Enter on your keyboard
- Click the header for the table you are updating (shown in the image above)
- Click anywhere else on the grid
Do not click EDIT COMMENT unless you'd like to add notes about this table.
Edit Attributes
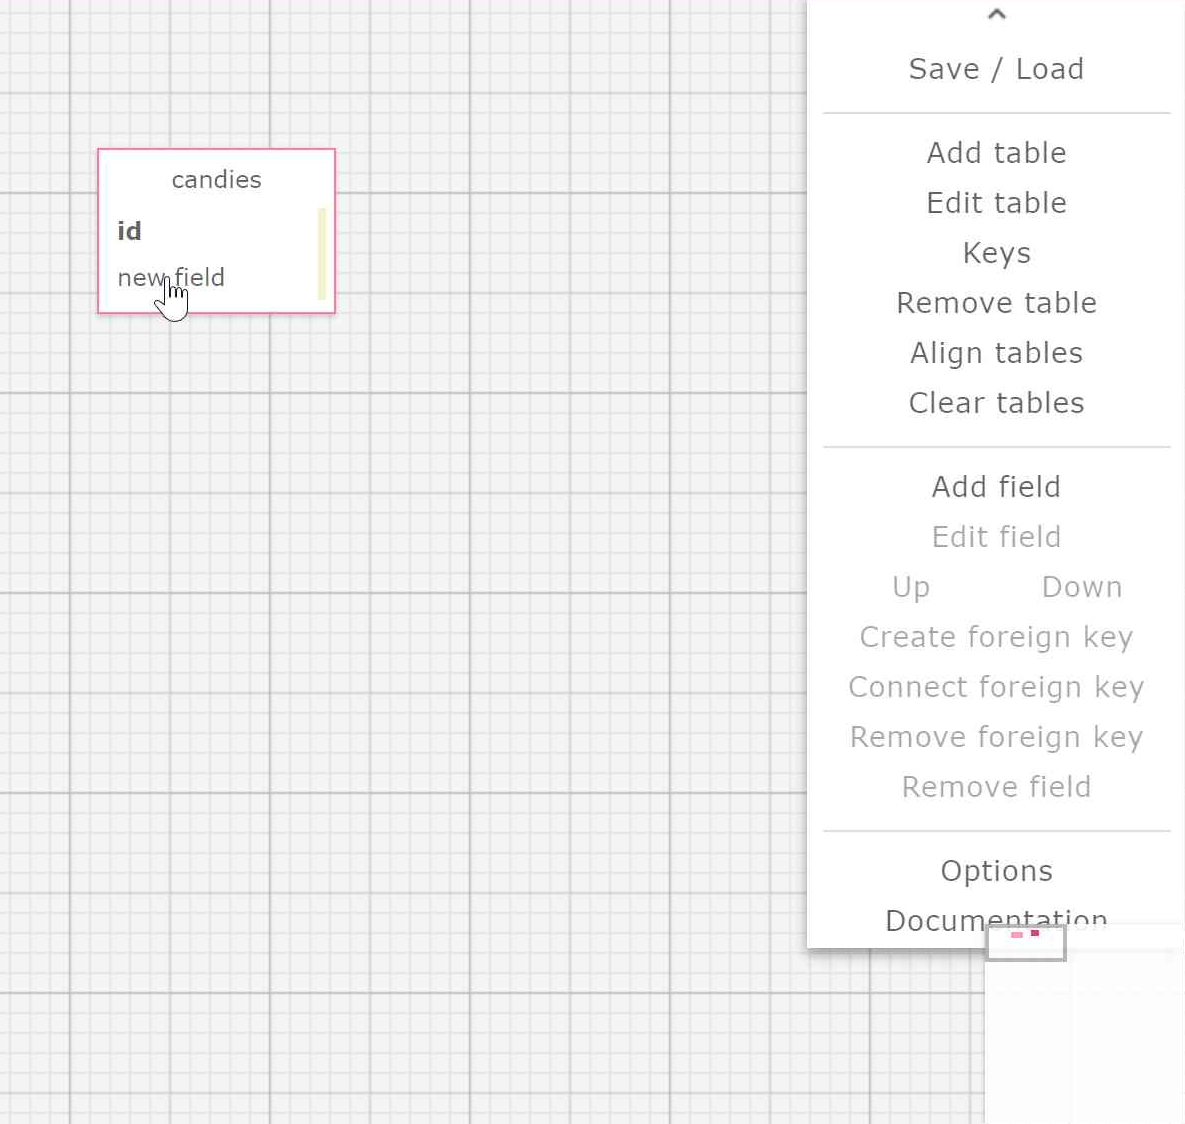
If you made a mistake or would like to change an attribute name, just click the specific attribute. Once it's selected, you can choose the Edit field action.
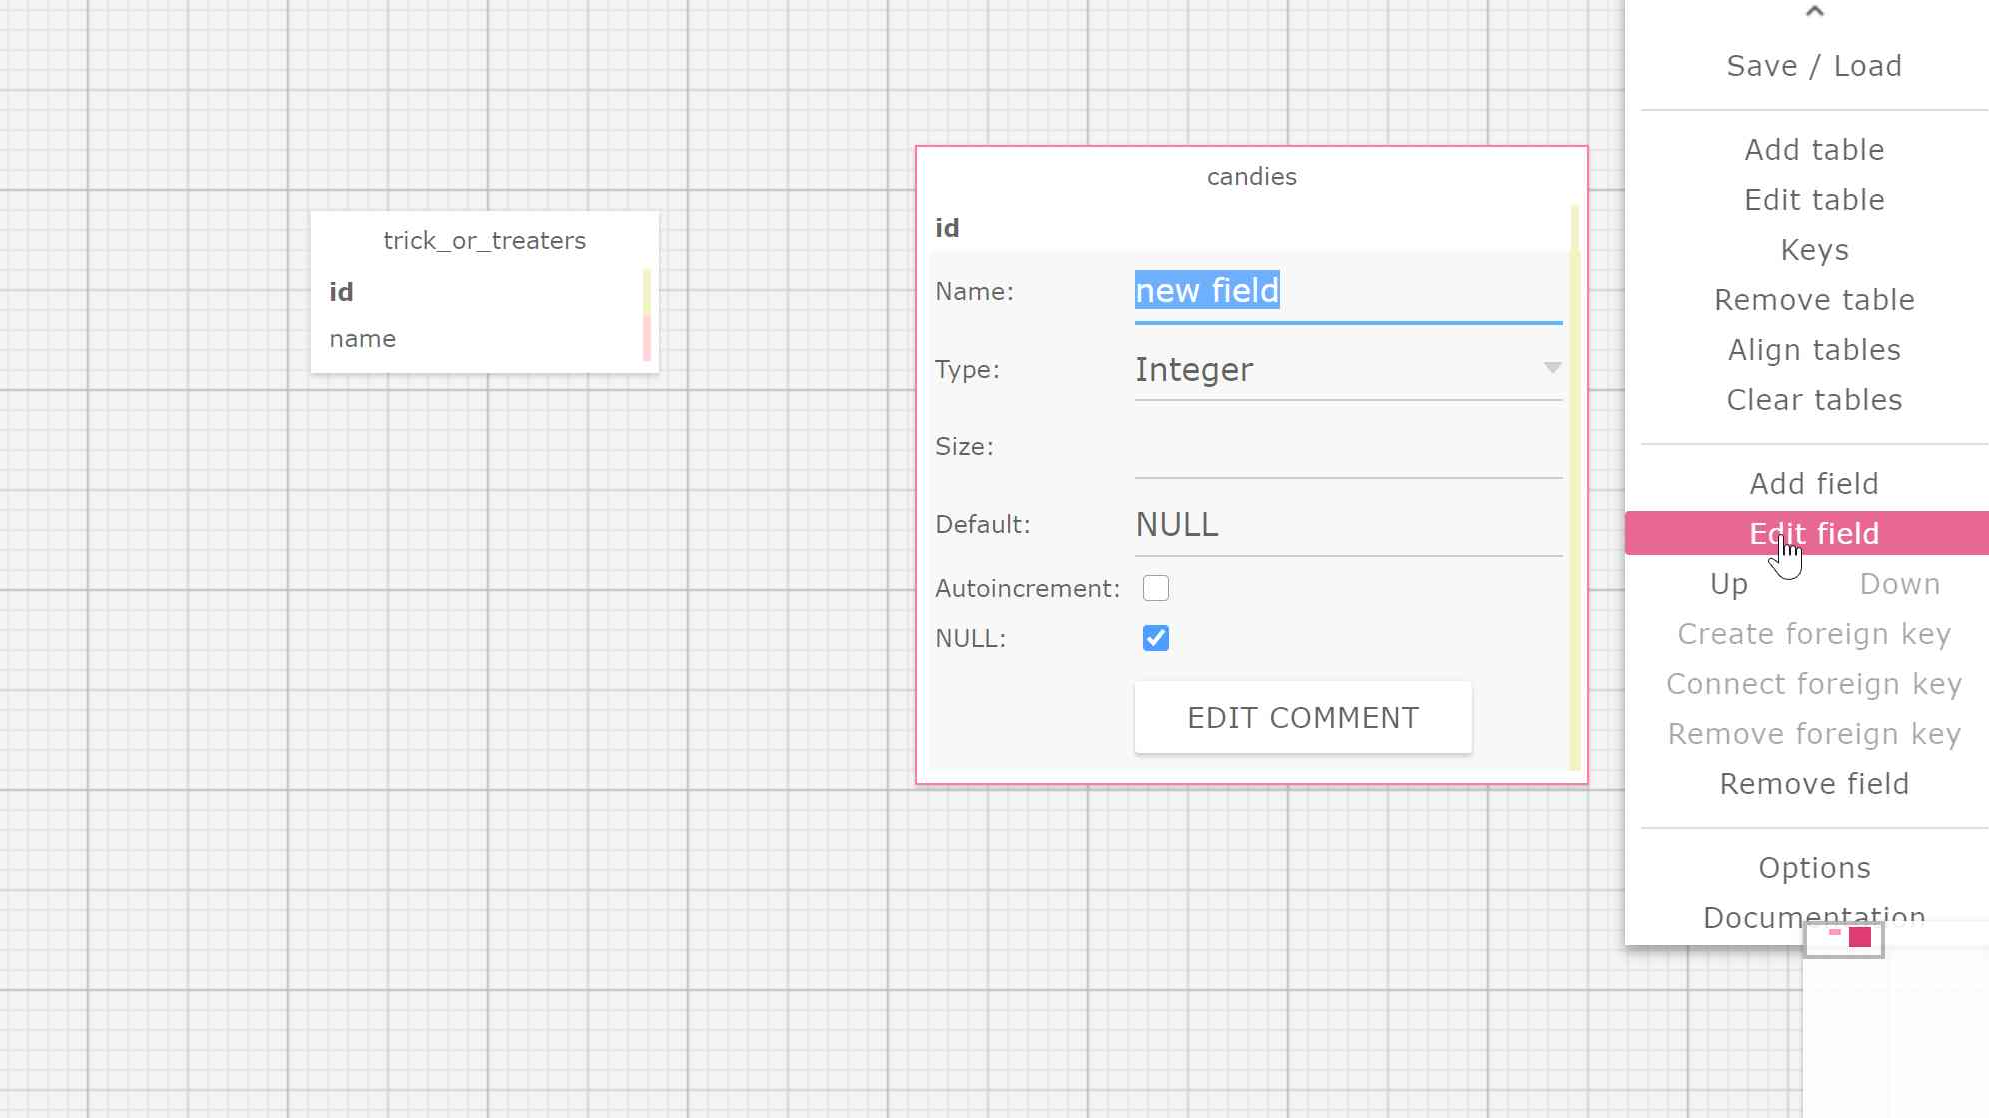
Then you can simply follow the same instructions for adding attributes to update and save the table.
Create Relationships
To add relationships between tables, we need foreign keys. The foreign key of one table corresponds to the ID of another table. There are two methods to add foreign keys in SQL Designer. As we walk through the two methods, take note that in the example images below, we are adding a trick_or_treaters foreign key to a trick_or_treaters_candies join table, which is part of the process of creating a many-to-many relationship.
The first method is to manually enter the foreign key and then connect it to another table. To do so, click on the table (trick_or_treaters_candies) that will be taking the foreign key and add an attribute. Set the attribute name to the SQL singular syntax of a foreign key (trick_or_treater_id).
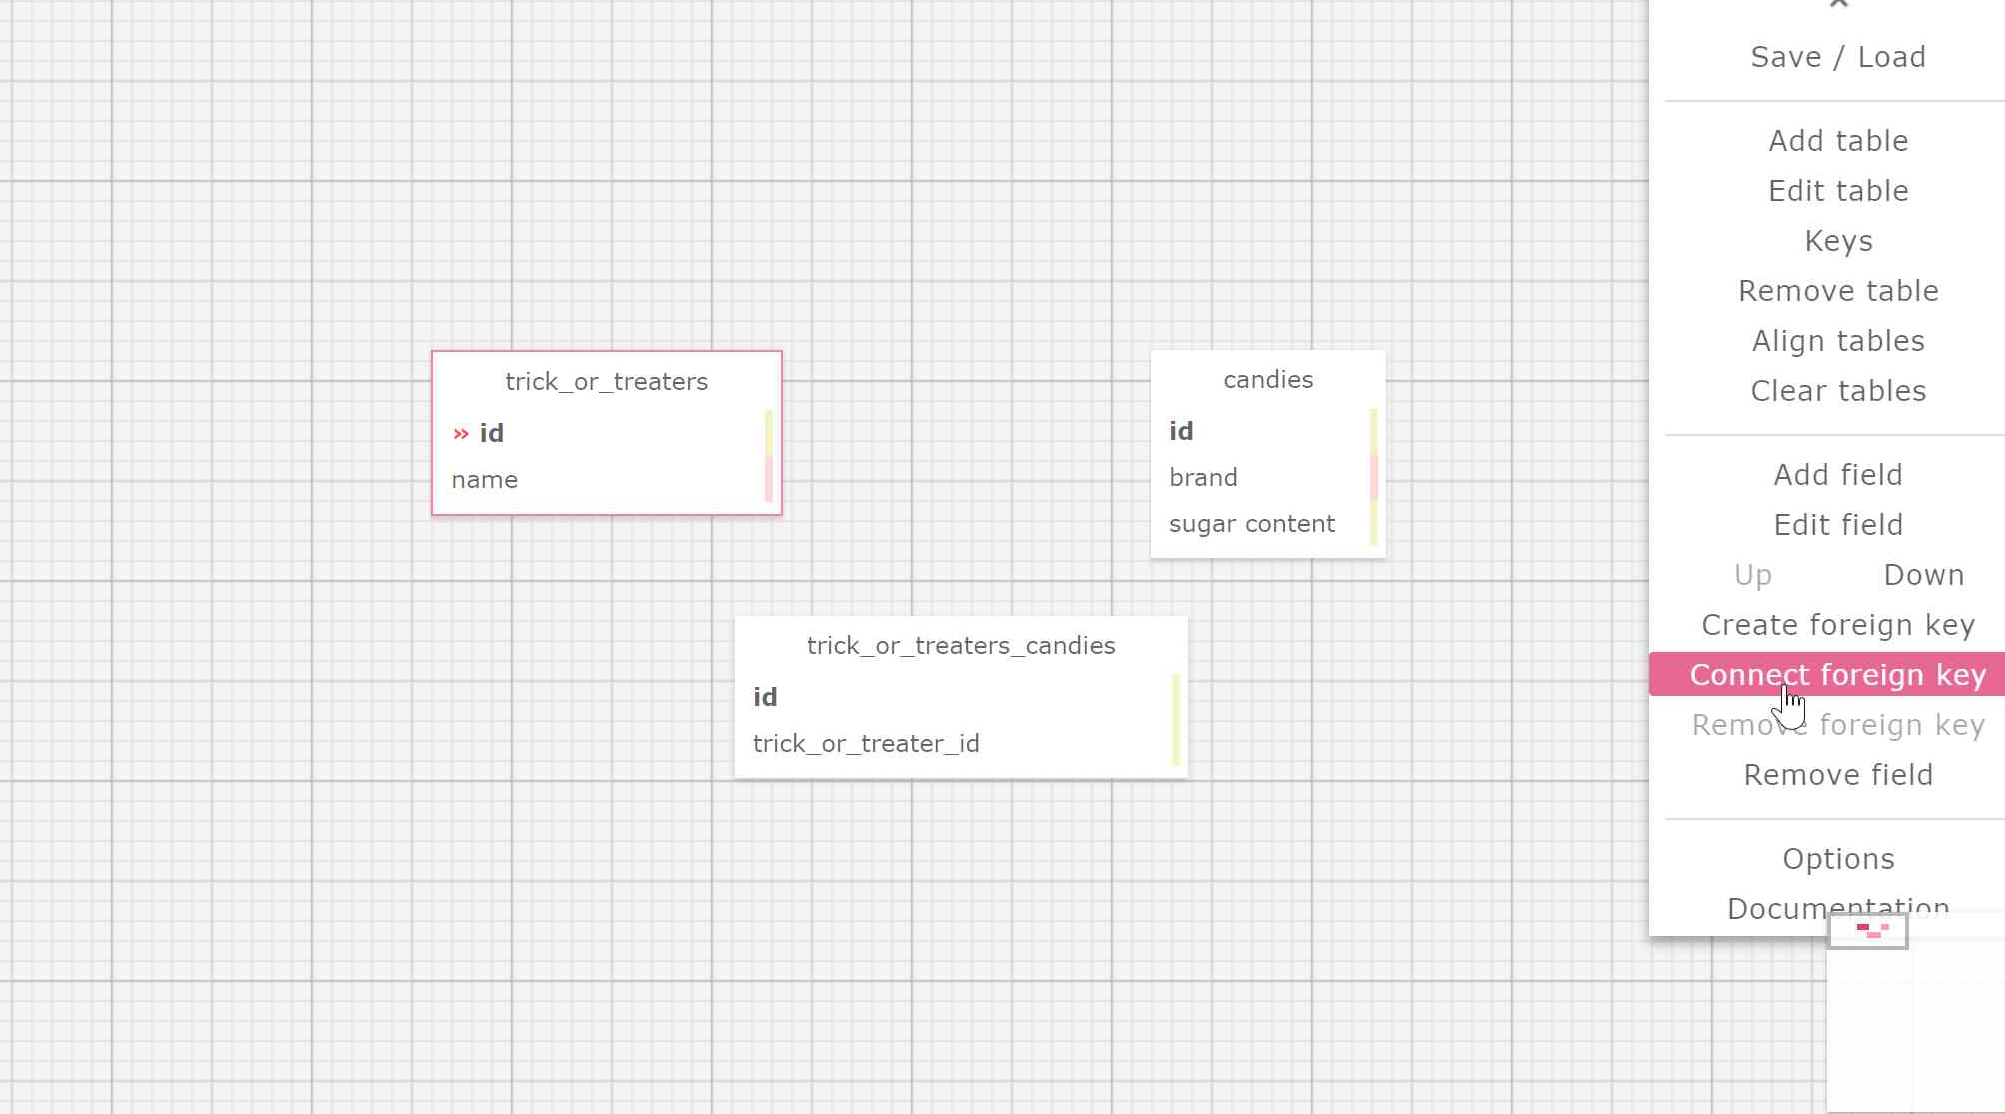
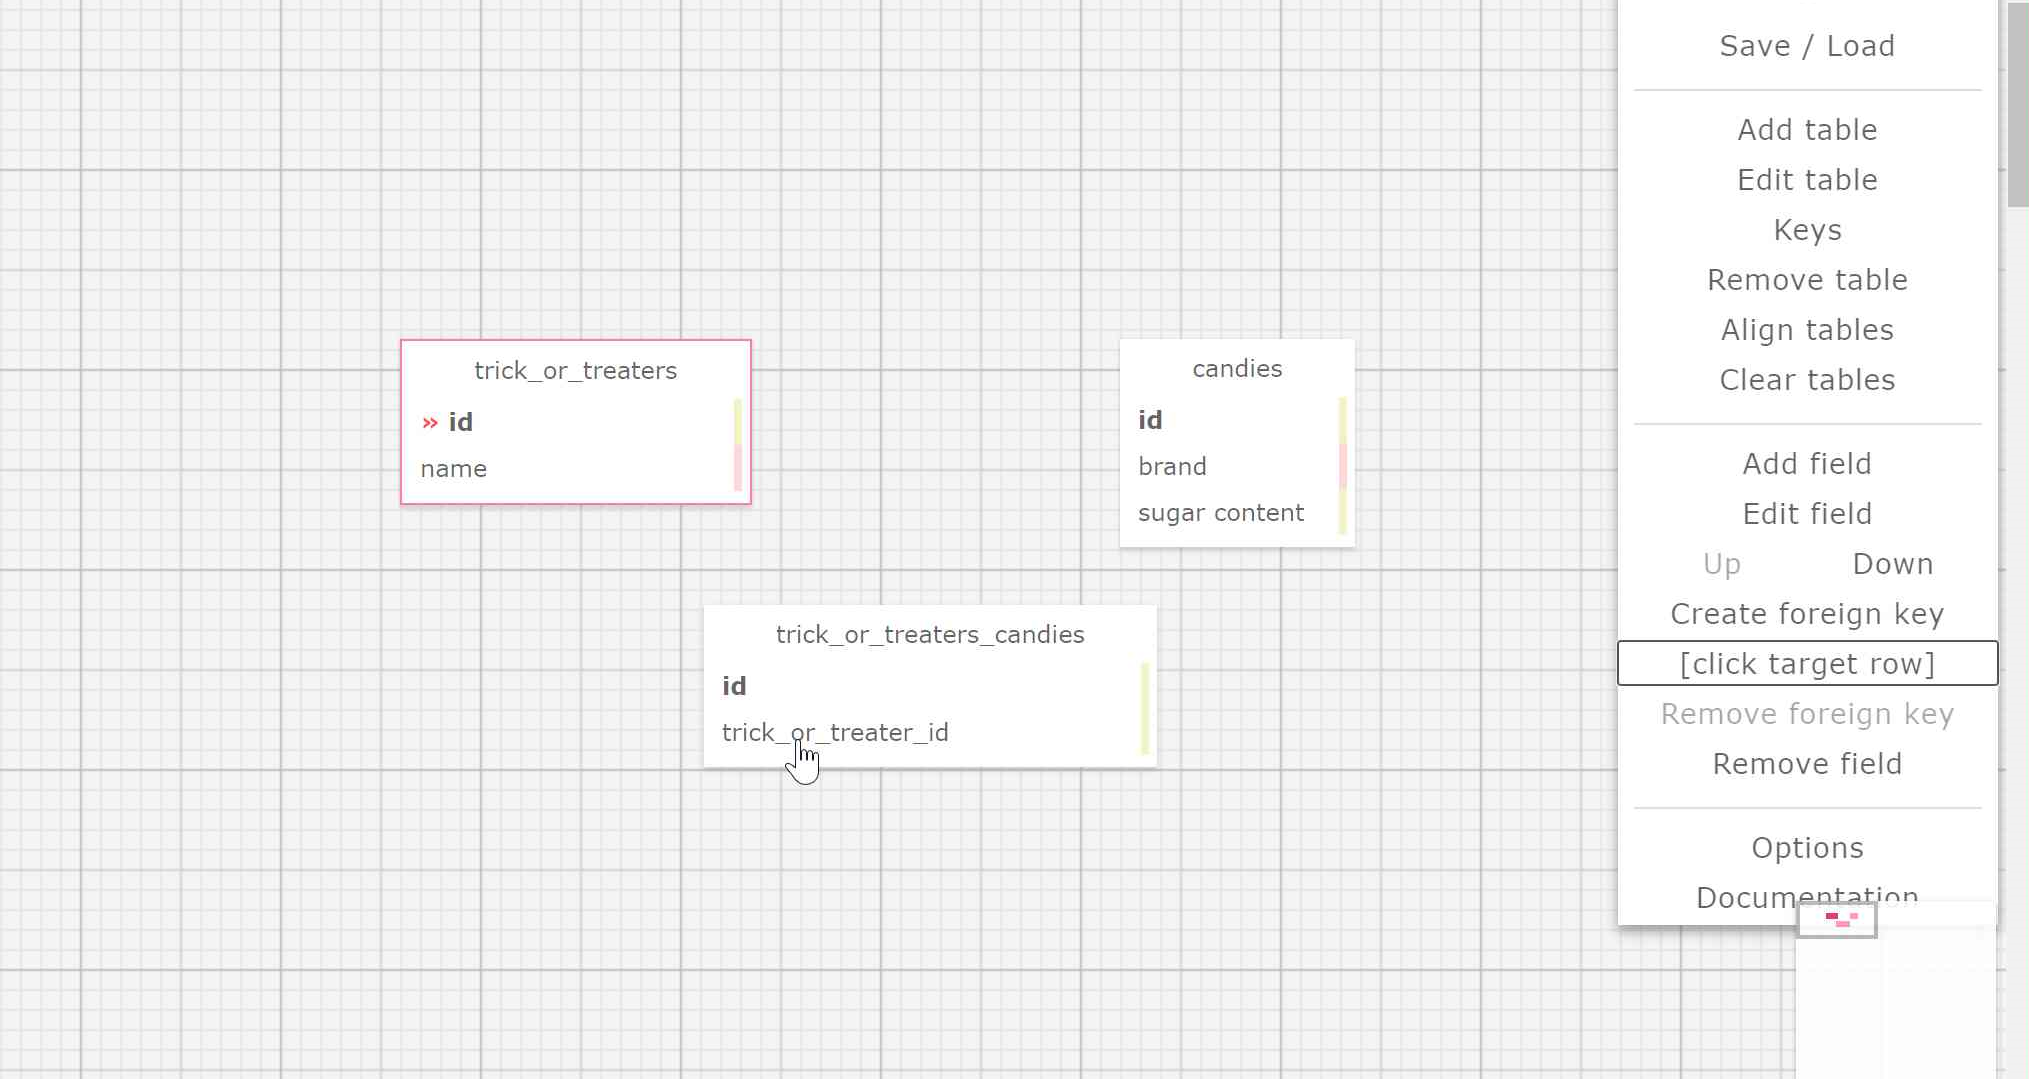
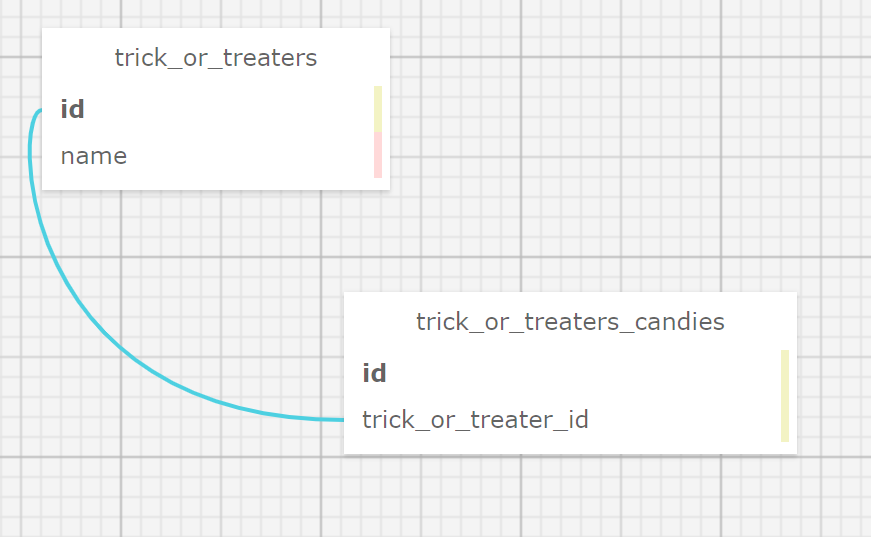
Next, select the id attribute from the table (trick_or_treaters) you're grabbing the foreign id from, select Connect foreign key, and then select the foreign key attribute (trick_or_treater_id) you just made. A connection line should now show between these two points.
The second method is to select the id attribute from the table (trick_or_treaters) you want to grab the foreign id from. Then use the Create foreign key action. This will prompt you to select the table (trick_or_treaters_candies) that will hold the foreign key. This will connect the id to the foreign key.
One-to-One Relationships
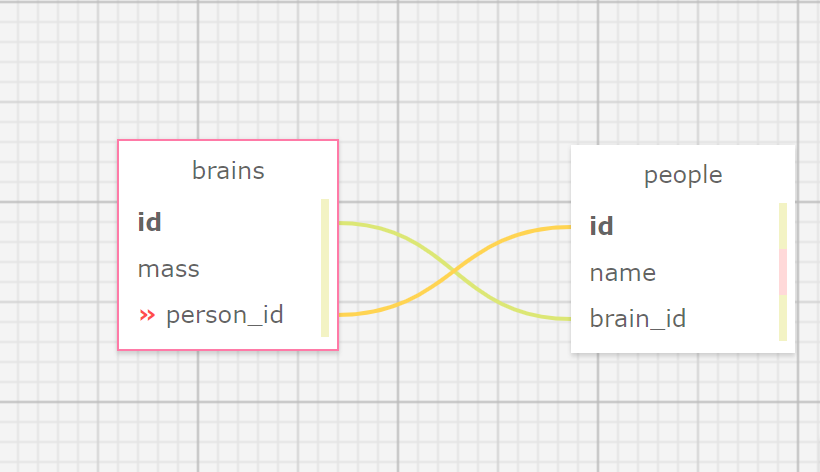
For one-to-one relationships, you will need to connect a foreign key in each table to each other. For example, a person only has one brain and a brain is only used by one human.
One-to-Many Relationships
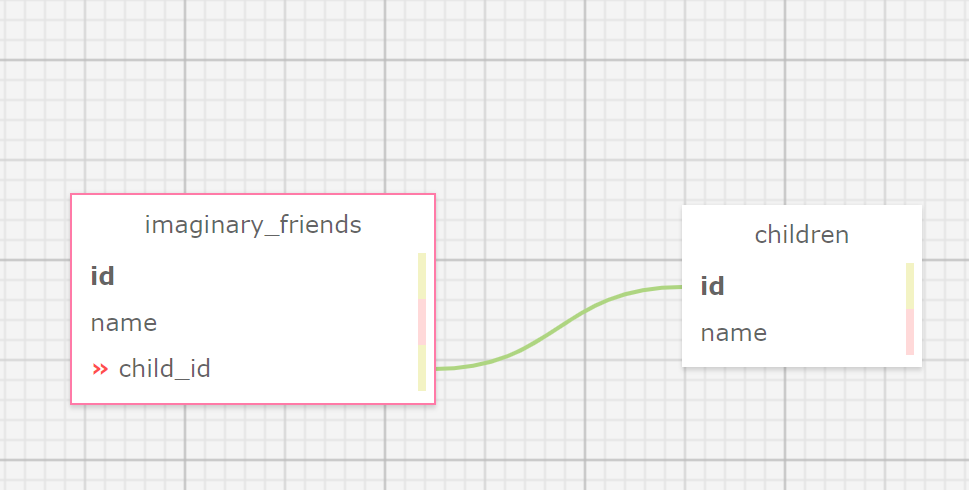
For one-to-many relationships, you only need to connect the id of the one to the table which has items that can belong to the one. For example, each child can have multiple imaginary friends but each imaginary friend belongs to one child.
Many-to-Many Relationships
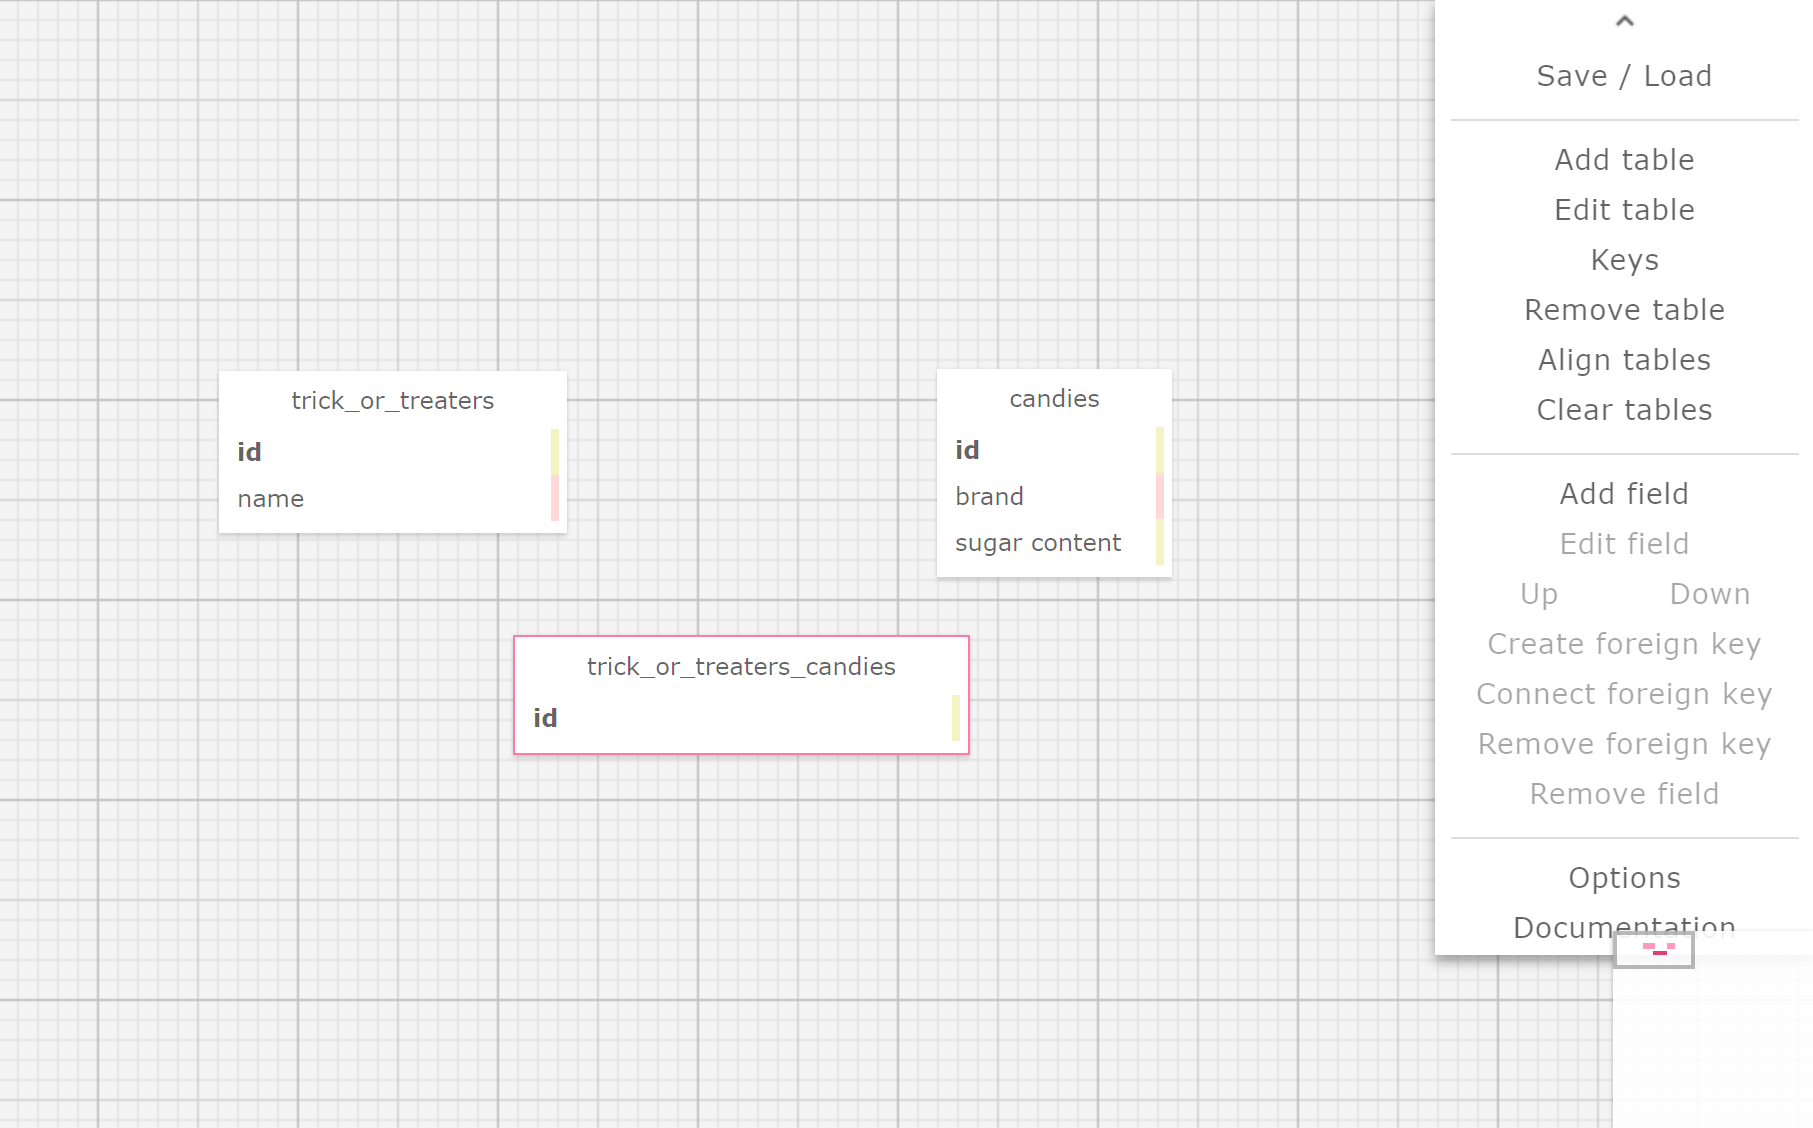
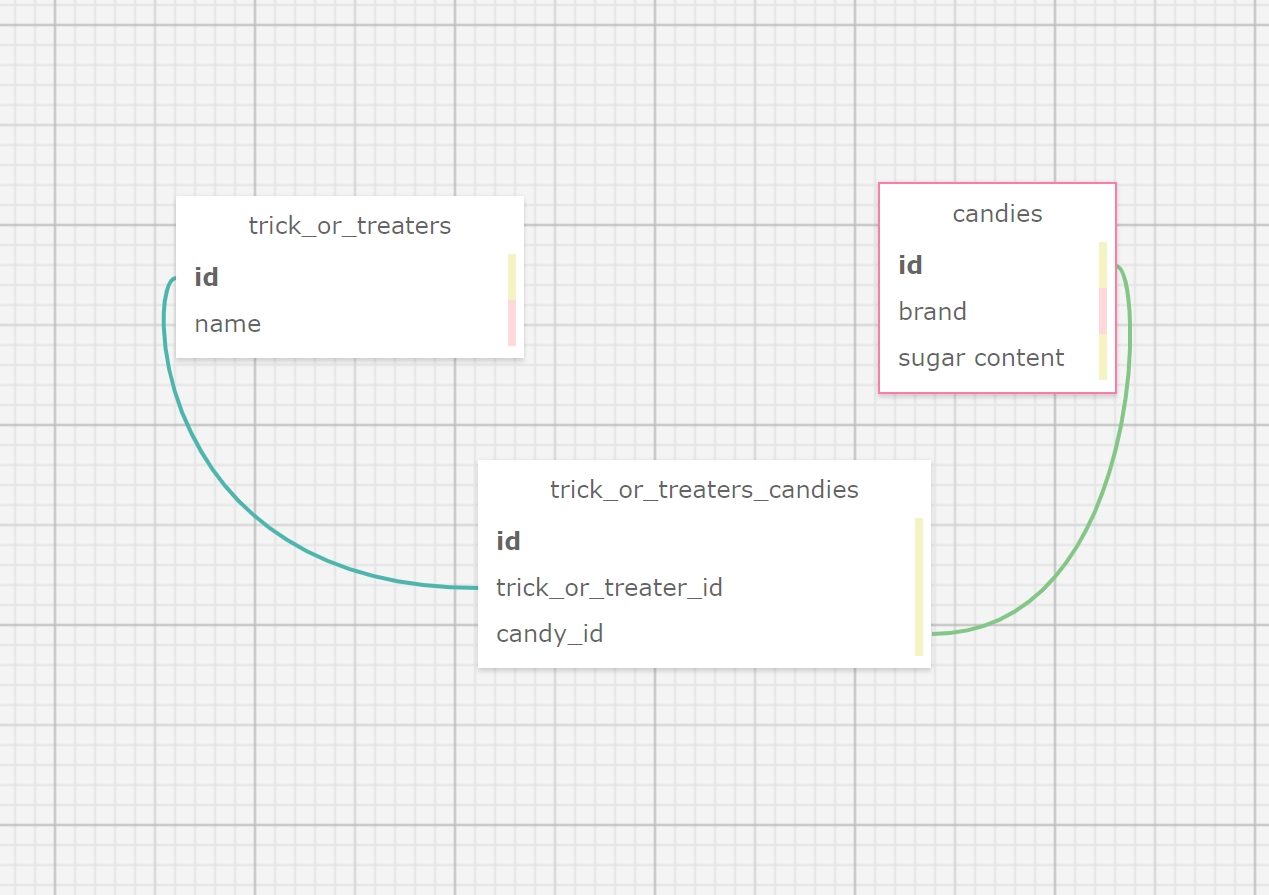
For many-to-many relationships, you will need to create a join table first. Then use one of the two methods we mentioned above to add foreign keys for both of the tables being joined. For example, a trick or treater can have many types of candies and those same types of candies can also belong to other trick or treaters.
Example of a Complete Schema
A full connected schema would look something like this if all of these examples were in the same program:
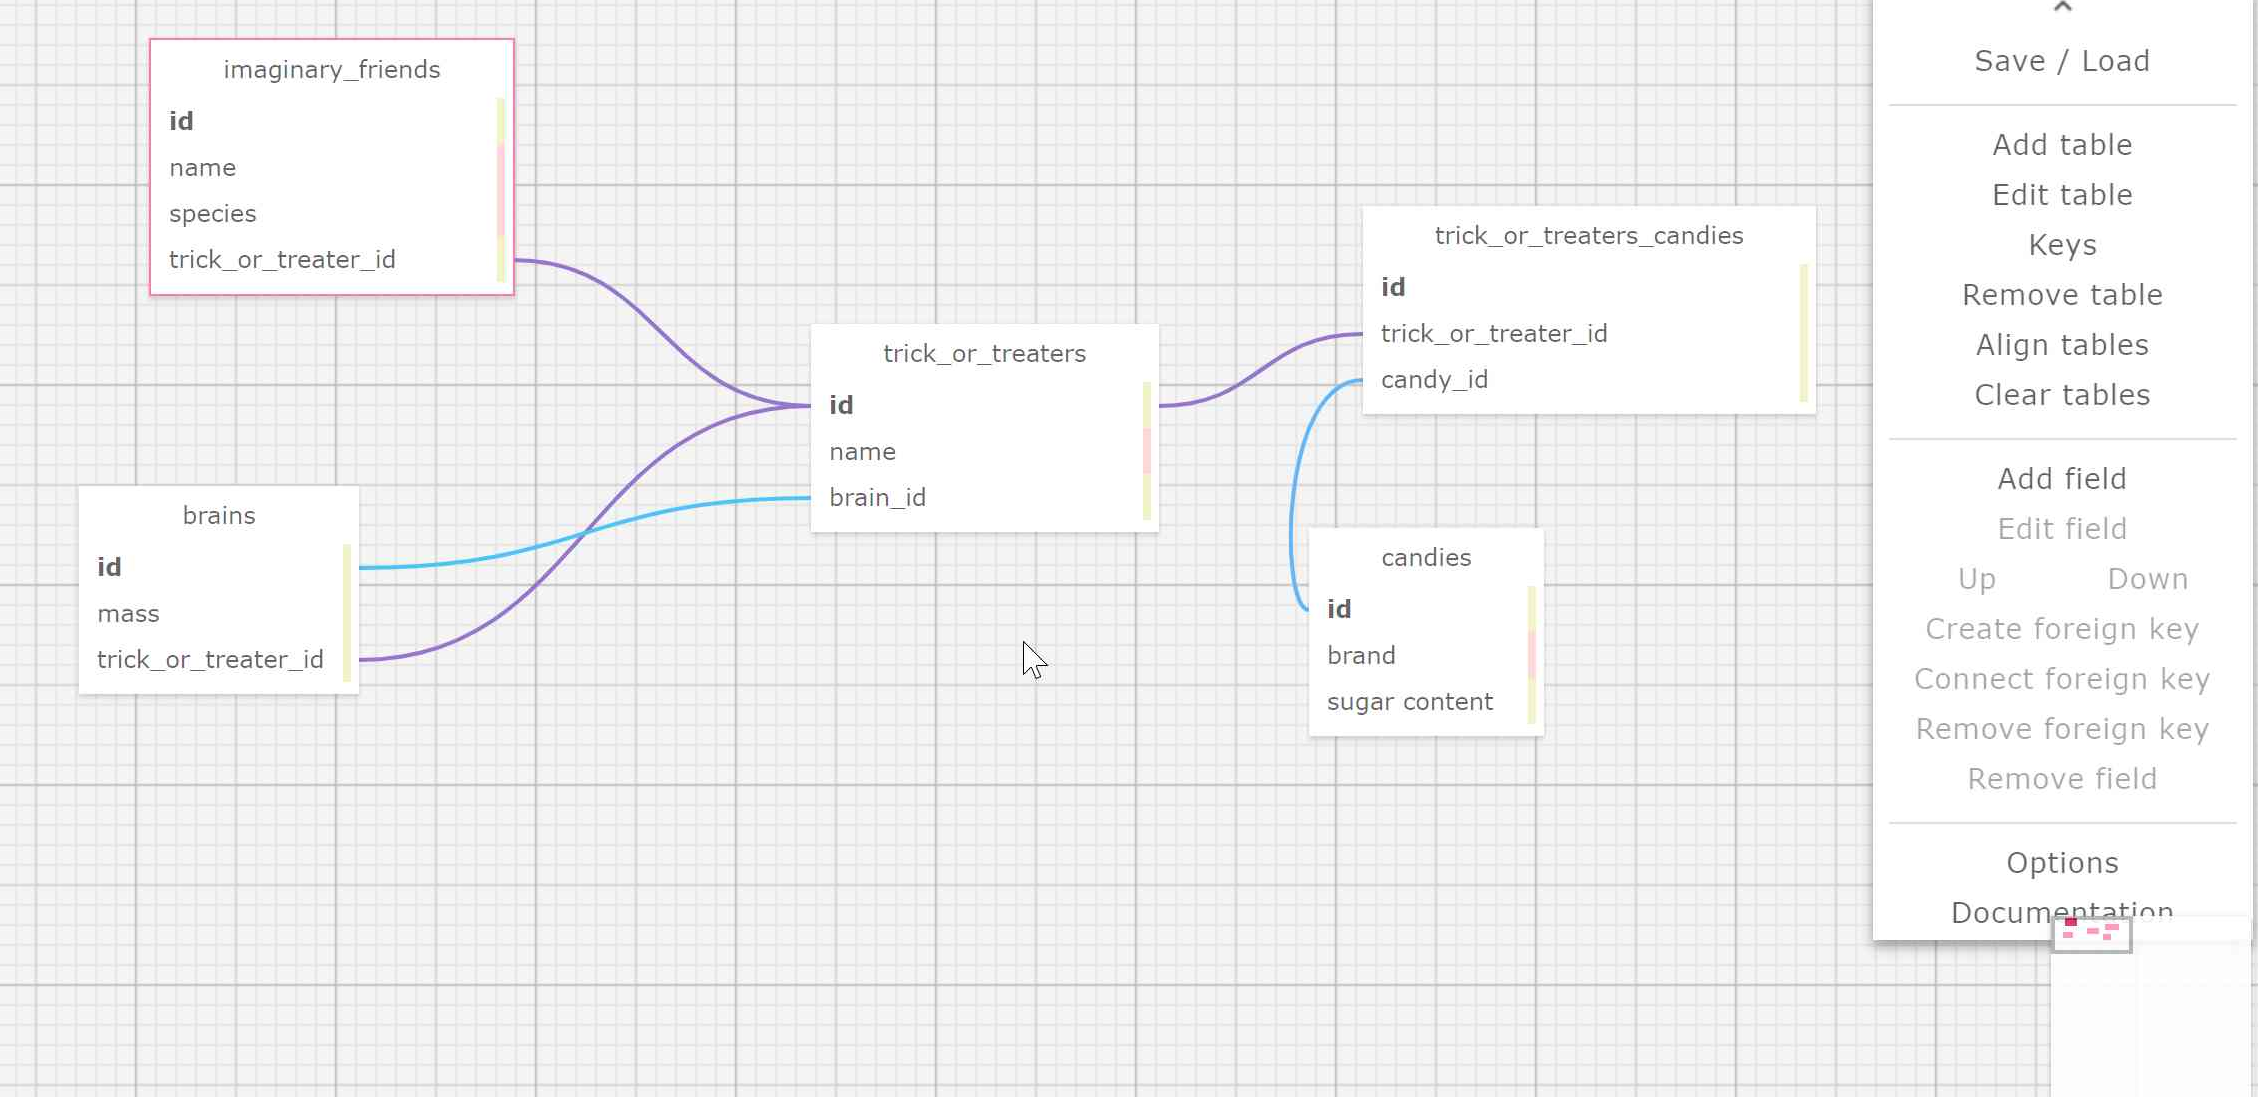
To remove a connection, click the foreign key you want to remove and click Remove foreign key. The attribute will still exist for you to connect to another id, you can click Remove field to delete it completely.
When you are done, take a screenshot of the schema and add it to your README!