📓 3.3.0.04 Introduction to MySQL Workbench: Creating a Database
We'll use a tool called MySQL Workbench to manage our databases. It was created to manage MySQL using a graphical interface. In this lesson, we'll walk through how to use the interface to view, configure, and interact with our databases.
Note: See the Installing and Configuring MySQL lesson for instructions on installing MySQL Workbench.
Accessing MySQL Workbench
MySQL Workbench is a GUI (graphical user interface) to interact with databases. Here's how we access the interface.
-
First ensure the MySQL server is running by opening Terminal or GitBash (or Windows PowerShell if GitBash does not work as expected) and entering the command
mysql -uroot -pepicodus. -
After the servers start running, open MySQL Workbench.
-
Double click the MySQL instance in the MySQL Connections section. You may be prompted to enter a password. If so, type
epicodusif you are using an Epicodus machine or your password if you are using your personal machine. -
This will open our MySQL instance.
Follow these same steps to access MySQL Workbench for all future projects.
Viewing existing databases with MySQL Workbench
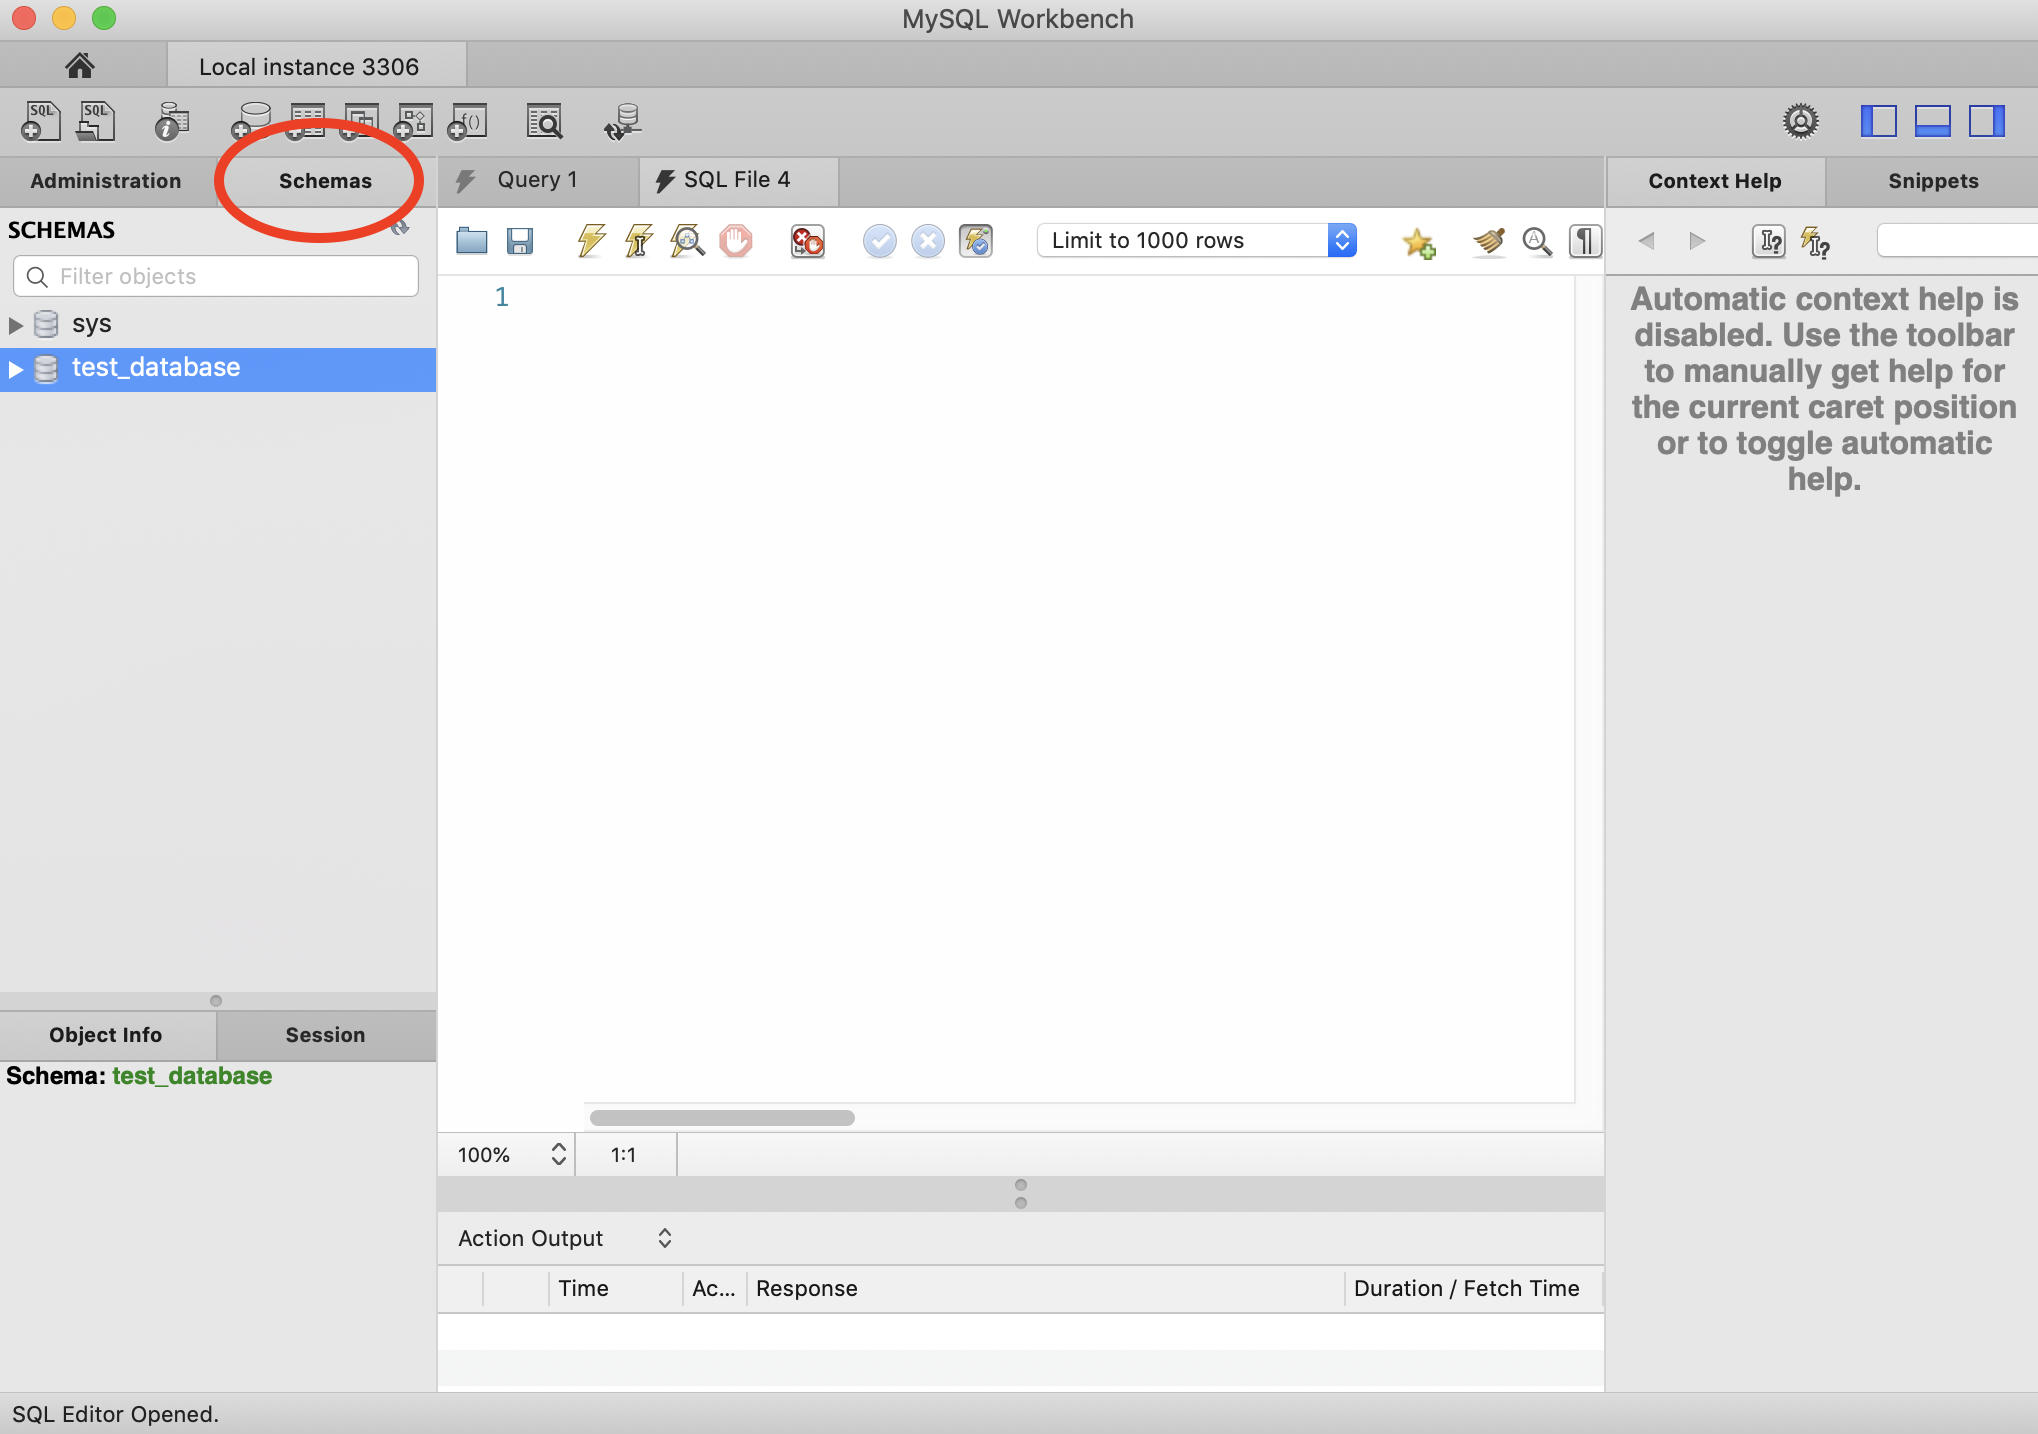
Once we've opened our MySQL interface, we can look at the current databases by clicking on the Schemas tab:

A schema is simply the structure of a database. In the screenshot above, we have two:
sys
test_database
Don't worry if test_database isn't showing in your instance. The sys database contains system information for our MySQL server.
The window where the schemas are currently being displayed in MySQL Workbench is called the navigator window. Note that the navigator window can display information other than schemas as well.
Other databases may be included such as:
information_schema
mysql
performance_schema
A quick reminder: don't ever alter default databases. If these files are removed or altered, MySQL will need to be reinstalled. Never alter the information_schema, mysql, sys, or performance_schema, databases in MySQL Workbench.
Creating a Database with MySQL Workbench
After accessing MySQL Workbench and viewing existing databases, we can create a new database with the following steps:
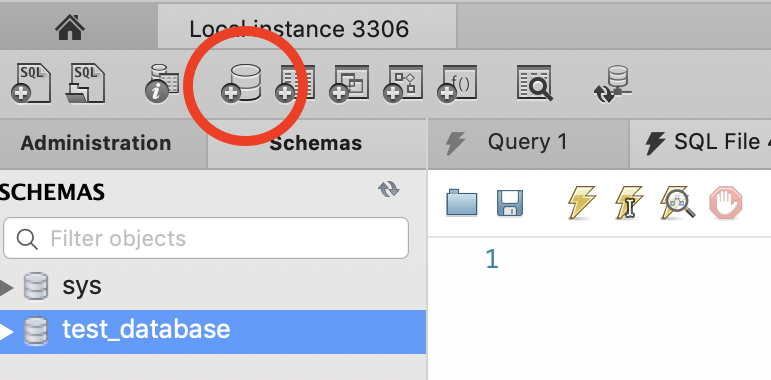
- In MySQL Workbench, click the Create a new schema in the connected server option in the top navbar. It's the fourth icon from the left:

-
Alternatively, we can right-click in the Navigator window and select Create schema...
-
In the Main window, we now see a new_schema page.
-
Enter a name in the Database name field. For this first project, let's call our database
to_do_list_with_mysqlconnector. -
We can leave the defaults in place in the drop down options.
-
Click Apply.
-
A window will appear showing the SQL command to be executed. Select Apply and Finish (or Close) to confirm our new database.
If we click on the Schemas tab, to_do_list_with_mysqlconnector will now be among the listed databases in the navigator window.
Creating Tables with MySQL Workbench
We'll add a table with two columns to our new schema. We'll call the table items and include the following columns:
-
The
idcolumn will only accept integers. -
The
descriptionfield will only accept string values.
Let's create this table now.
- Toggle the
to_do_list_with_mysqlconnectordatabase to view its contents.
Tables
Views
Stored Procedures
Functions
-
Right-click Tables and select Create Table...
-
Enter
itemsin the name field. -
Add an
idcolumn by clicking <click to edit> in the window right below the name of our new table.- Name the column
idby double-clicking on theColumnfield and typing in the new name. - Select INT from the Datatype dropdown.
- Check the PK (primary key), NN (not null) and AI (auto increment) checkboxes. Our
idcolumn will be our primary key, which means we don't ever want it to have anullvalue and we always want it to auto-increment.
- Name the column
-
Add another row in this window and do the following:
- Name the column
description. - Select VARCHAR under Type and add 255 to the Length/Values argument, instead of the default 45.
- Name the column
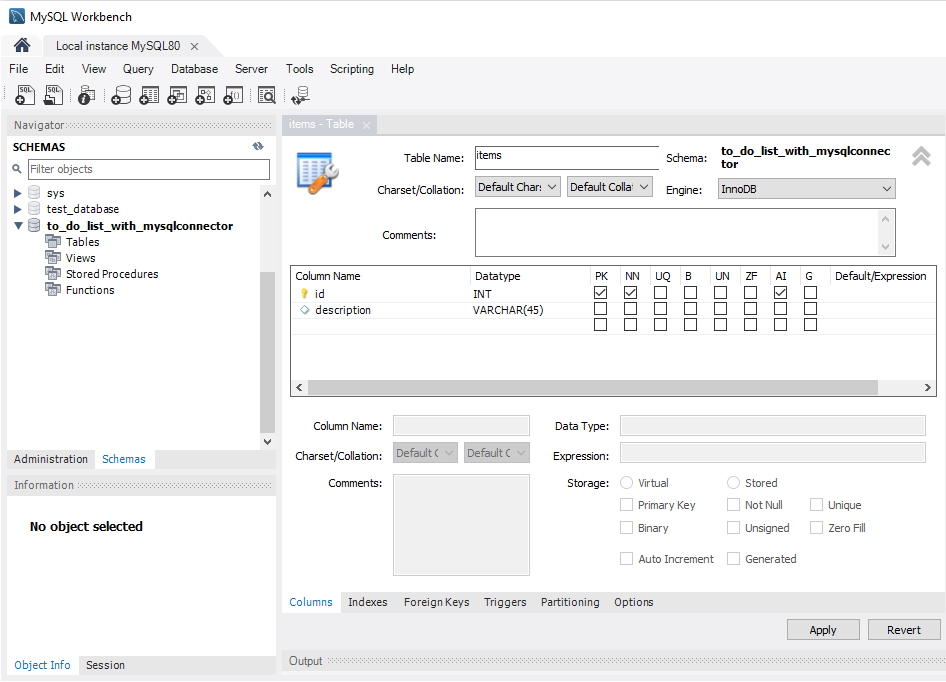
The following screenshot demonstrates what the window should look like after the two columns have been added:

If you make a mistake with one of the columns and want to start over, right-click on the column and click Delete Selected.
Previewing & Saving
- Next, click the Apply button on the bottom right of the page. A dialog box will pop up. The SQL statements that appear are very similar to what we'd type in the command line if we were creating this table manually:
CREATE TABLE `to_do_list_with_mysqlconnector`.`items` (
  `id` INT NOT NULL AUTO_INCREMENT,
  `description` VARCHAR(255) NULL,
  PRIMARY KEY (`id`));
- After confirming our SQL, we can click Apply and Close to generate this table.
MySQL Workbench makes it much easier to add and update databases. With just a few clicks, we were able to add a new database and table for our To Do List. In the next lesson, we'll learn how to connect this database to our application.